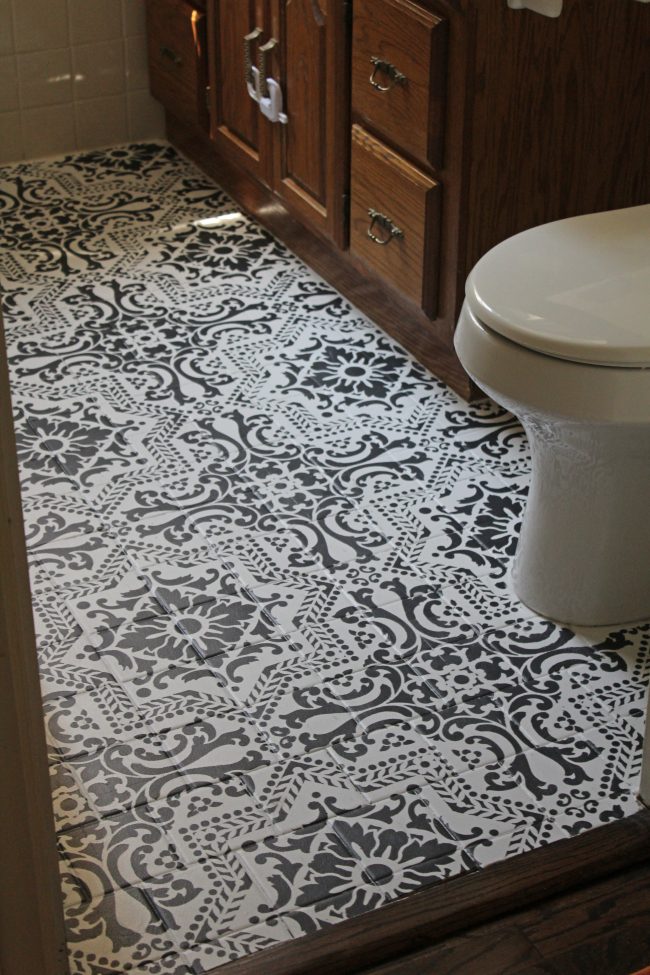
This black and white stenciled bathroom floor project is the perfect way to freshen up old tiles and give them a modern look – on a budget!
This post may contain affiliate links
A big, huge THANK YOU to Rust-Oleum and Royal Design Studio for sponsoring this post!
I have been talking a lot lately here on the blog about our upcoming upstairs bathroom renovation (here and here). And while that’s currently being worked on (I’ll share a progress update soon!), I couldn’t help but feel like our main floor bathroom was looking a little sad and left out.
Enter: a stenciled tile floor makeover that is super budget-friendly and mimics the look of those fancy graphic concrete tiles that are ALL over Pinterest these days. Seriously. I PAINTED my old 1950’s tiles, and they look amazing!
*EDIT: This has, by far, been one of my post popular blog posts and one of the most pinned images on Pinterest. Thank you everyone for reading! If you’re here from Pinterest, WELCOME and thank you for stopping by! If you don’t already follow me on Pinterest, please consider doing so – I pin all kinds of awesome stuff! I’m on Instagram, too!
I hope you’ll check out some of my other posts while you’re here, too!
See more of my DIY projects and inspiration [here]
Check out a home tour [here]
Check out some fashion posts [here]
EDIT: BEFORE YOU READ ANY FURTHER, READ THIS POST FIRST. It’s an update on how our floors are holding up. Trust me, read it.
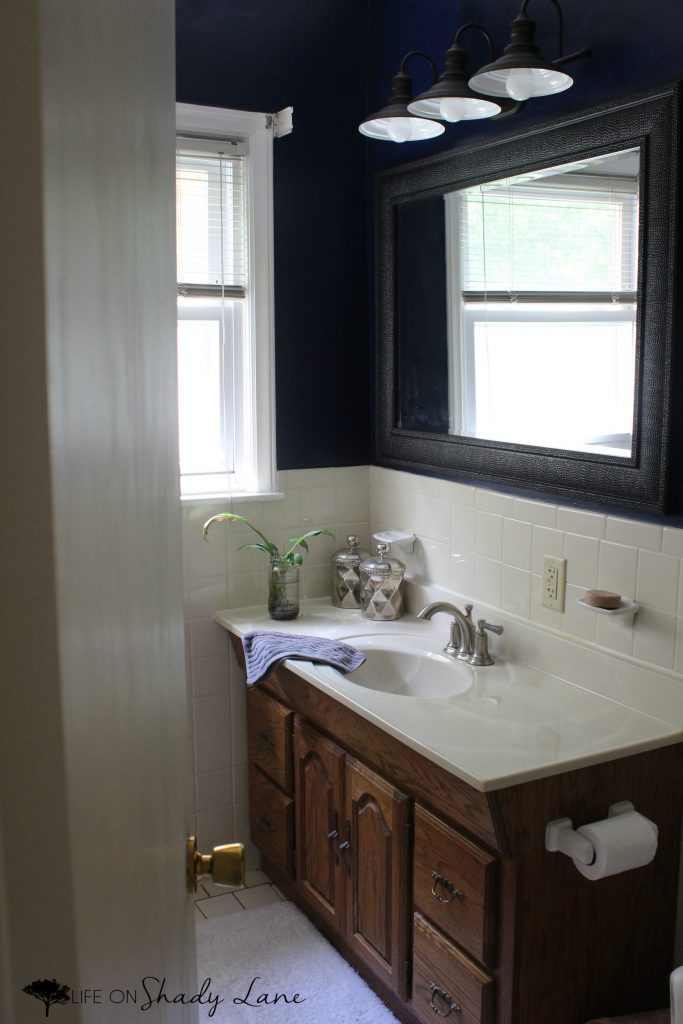
Before I tell you exactly how I painted our bathroom floor, let’s just take a walk down memory lane, shall we? Here’s what the bathroom looked like before we moved in:
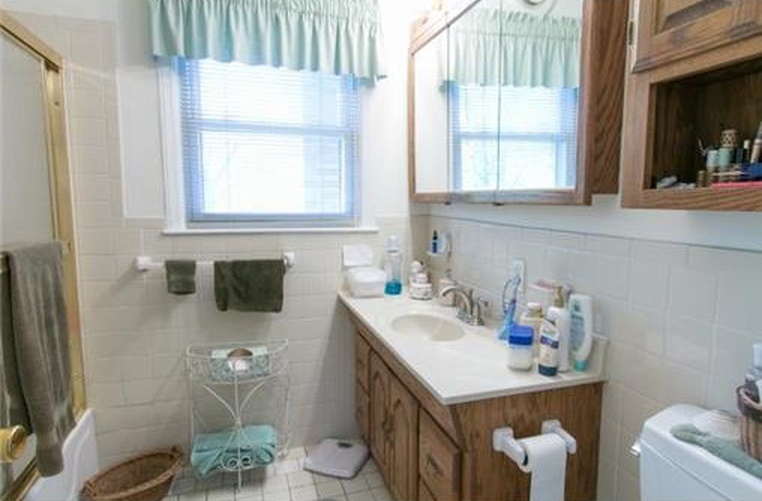
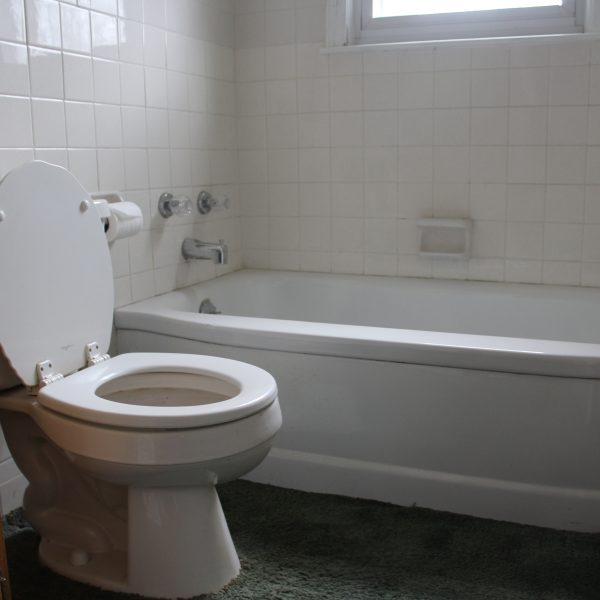
When we first moved in to our house, one of the first things we did was remove the sliding shower doors in the bathroom. They were gross and not practical for bathing a baby, so we ripped them out ASAP. You can see more photos of the room here, here, and here.

Then, we took out the mirror/medicine cabinet and outdated light above the vanity and replaced them with a more modern mirror and overhead light.
I had chosen every single paint color in our home at that point (check them out here!), so when Brandon wanted to choose the bathroom paint color, I told him to go ahead!
Well, I think about a day after painting the entire bathroom a dark blue color, Brandon told me he hated it. You win some, you lose some, right?! We decided to keep the color, though, until we could decide what we wanted to do with the walls.
Then, the vent fan quit working and we lived without one for far too long…and the paint started to look all droopy and weird from all of the moisture.
And to make a long story short, we’ve finally replaced the vent fan, but haven’t painted the walls. When we started planning for and working on our upstairs bathroom, though, I decided it was finally time to spruce up the main floor bathroom as well. But of course I didn’t want to spend a whole bunch of money and completely replace everything (like we’re doing upstairs)…so I came up with a plan to give this bathroom a budget-friendly makeover.
Remember when I painted our master bedroom wall with a stencil from Royal Design Studio? You can see photos of that project here. Well, let’s just say that the stencil bug bit me HARD after that project because it was so addicting! I have been lusting over those beautiful graphic concrete tiles that are all over Pinterest lately, but holy cow they are not cheap. Our old 1950’s off-white tile was ugly, but it just wasn’t in the budget to rip it all out and replace it. So I decided to stencil it!
Here’s what the tile looked like before:
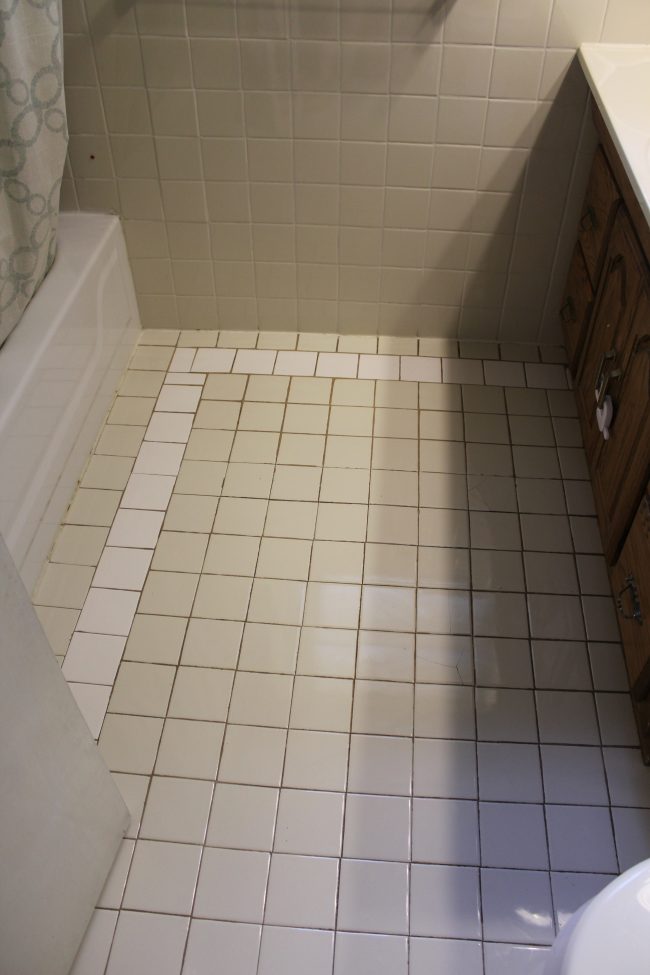
I’m not exactly sure if the grout was supposed to be brown or if it just turned that color after LOTS of years of walking on it. Let’s pretend it was made that color on purpose. But anyway, see what I mean? Not so pretty.
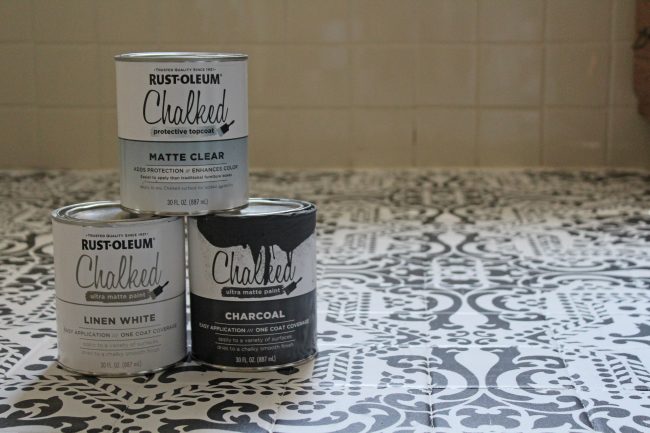
I decided to use Rust-Oleum’s Chalked paint in Linen White and Charcoal, and while the cans said that it wasn’t necessary to prime first, I got nervous immediately before starting the project and decided to run out and get a primer. If I were painting a piece of furniture or something, I doubt I would have primed…but since this was a slick bathroom floor (that gets wet), I wanted to be extra careful.
*NOTE: I need to say that while Rust-Oleum provided the paint for this project, they do not actually recommend using their Chalked paint on floors! I’ve seen similar projects that used chalk paint, though, and decided to go for it. My thinking was that the tiles were already awful – if it didn’t work out, I could just rip everything up and replace the tiles with new ones. Plus I like to live life on the edge. ;) And of course I will do an update at some point down the road on how the floors are holding up! EDIT: TODAY IS THE DAY! READ THIS POST BEFORE YOU ATTEMPT TO PAINT YOUR FLOORS!
I looked around at lots of different bathroom solutions to give me an idea of what I needed to do before I started, and most of them told me one thing. CLEAN THE FLOOR. So I first cleaned the floor REALLY well and taped around the perimeter of the room. Then, I used a regular old paint brush to cover over those brown grout lines with the primer. I wanted to make sure that I got the paint into all of the grooves, but I also wanted to double up on the primer so the brown was all covered.
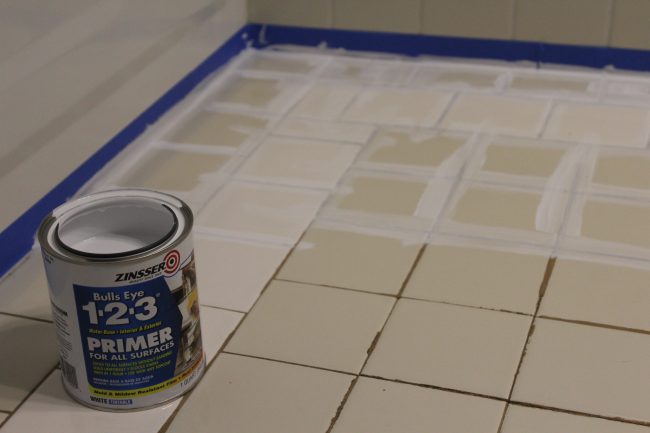
Then, I rolled primer over the whole floor.
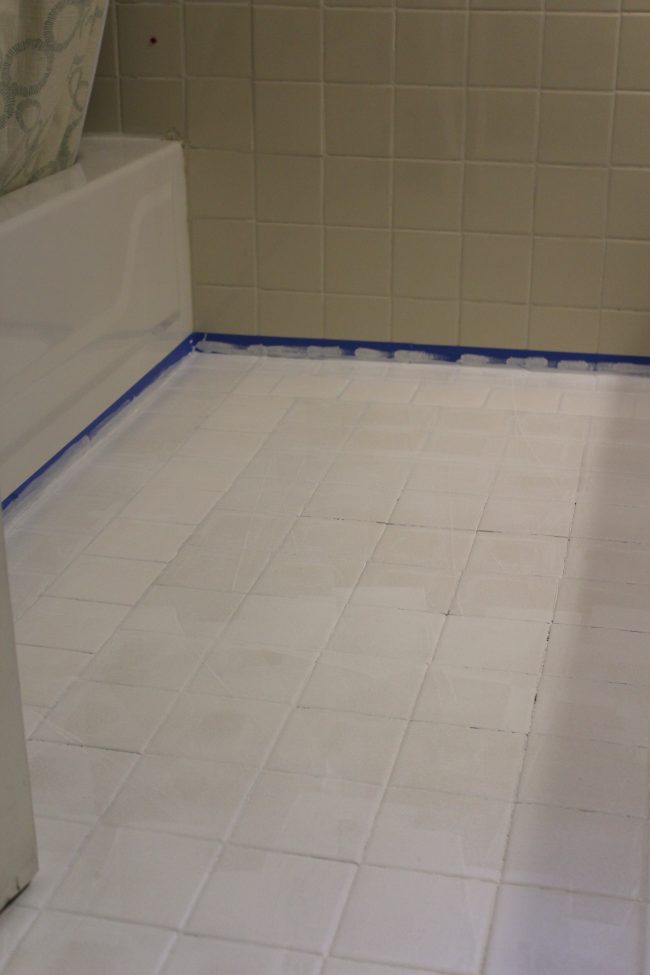
After priming, I waited about an hour and then went back in with the Chalked paint in Linen White, and painted the whole floor with one coat of that. When I stenciled our bedroom wall, I started out with a black/charcoal wall and used white and gray paint on top of that…so this time, I wanted to do the opposite (white background, dark stencil). Then, I let that coat dry for an hour.
A note on Rust-Oleum’s chalked paint: it’s matte, which is amazing…and it dries super fast. So it’s PERFECT for impatient people like me. Nobody likes to wait forever in between coats!
When it came time to stencil, I found the center point in the room and centered my stencil on that. Then, I used a small foam roller to roll on the Charcoal paint.
I used the Lisboa Tile stencil from Royal Design Studio, and I am in love, love, LOVE with it. I mean seriously…how pretty is it?!
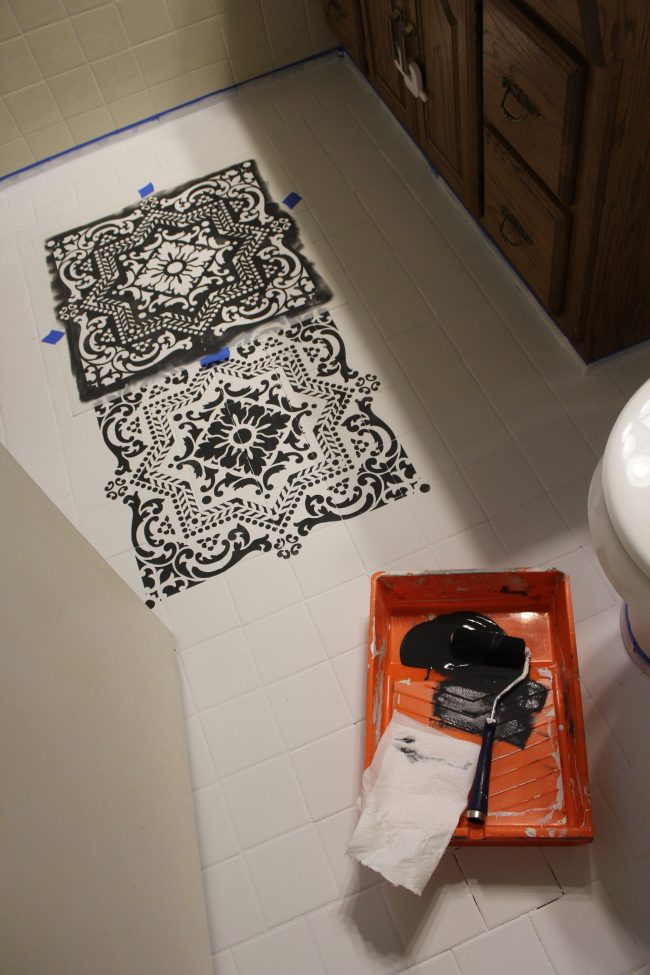
Stenciling looks really complicated, but Royal Design Studio actually makes it super simple (I promise!). There are little markers in the corners that you use to line up the next stencil perfectly, so everything comes out perfectly square and even.
If I were to give one tip about stenciling, it would be to use VERY LITTLE PAINT. It’s so tempting to want to load up your roller with extra paint so that the project goes faster, but don’t. If you do, it bleeds underneath the stencil and lines aren’t as crisp. Also, Rust-Oleum’s Chalked paint cans say that rolling isn’t recommended, but I did it anyway and it came out great. I never said I was a rule follower. ;)
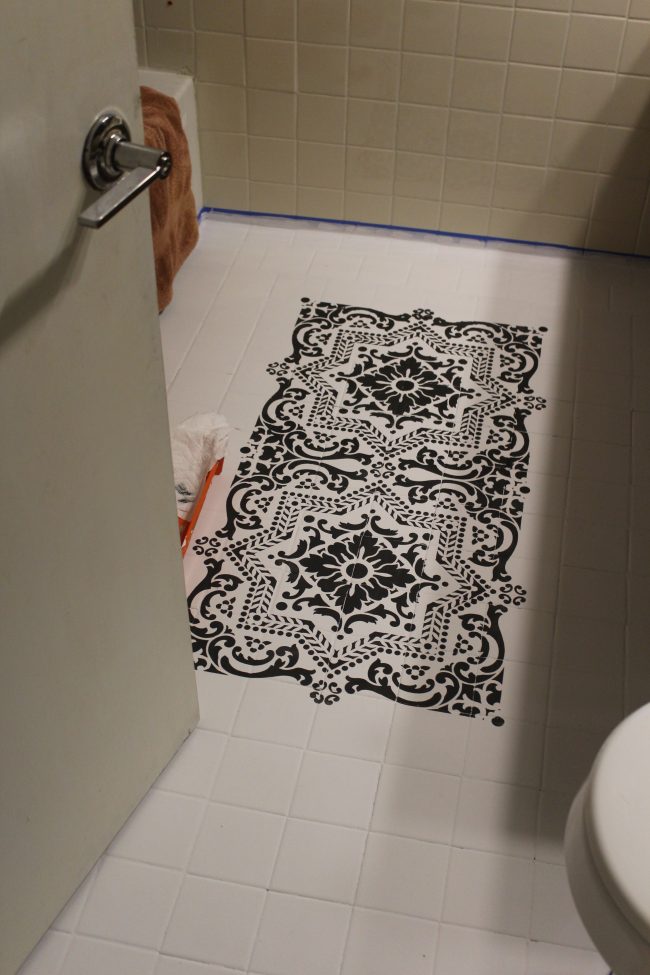
Even with minimal paint on my roller, there was some paint bleed under the stencil. So, to prevent the charcoal paint from spreading all over the white, I let my stencil dry after painting every one to two full stencils. Plus, that let the previous stencil dry so that when lining up it up next time, I didn’t spread paint even more. Make sense? Hopefully I’m explaining that well enough, but if not, just let me know in the comments and I can answer your questions!
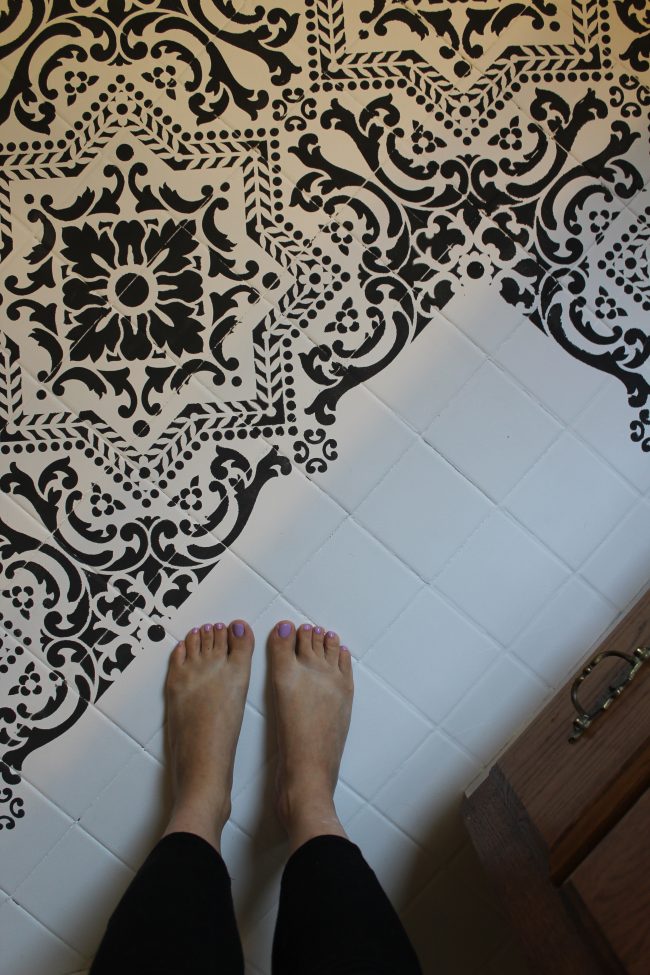
I did have to go in with a small paint brush after the whole floor was stenciled just to touch things up because I’m a perfectionist. I did that until Brandon came in and told me to “quit overdoing it.” LOL. The good thing about these detailed stencils is that when you look at the whole picture, it’s hard to notice the imperfections unless you’re looking for them. So nobody come over to my house and look for the imperfections, please! There are definitely quite a few. ;) I’m trying to embrace them, though.
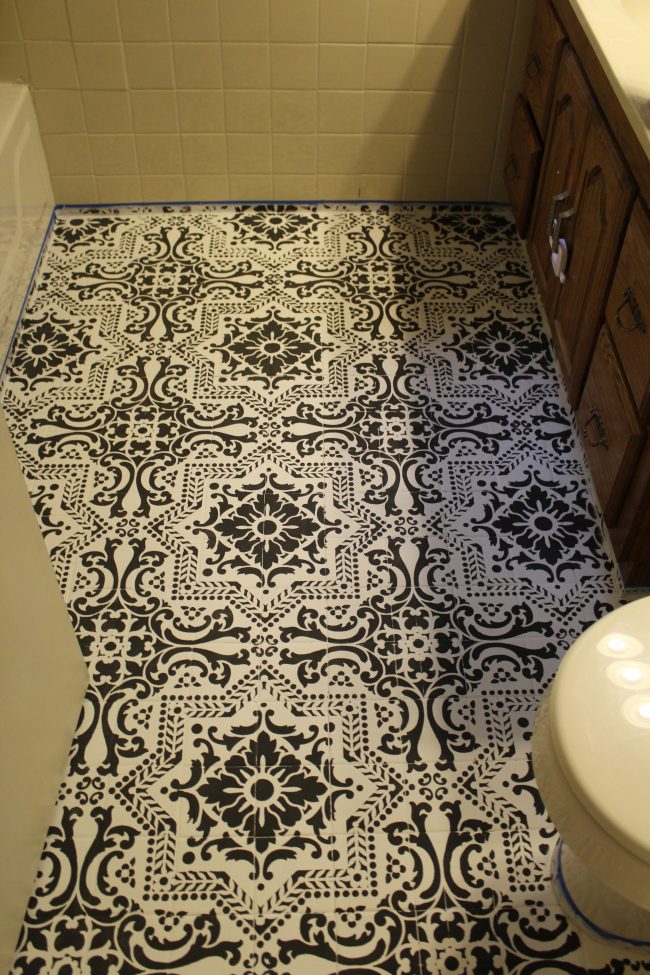
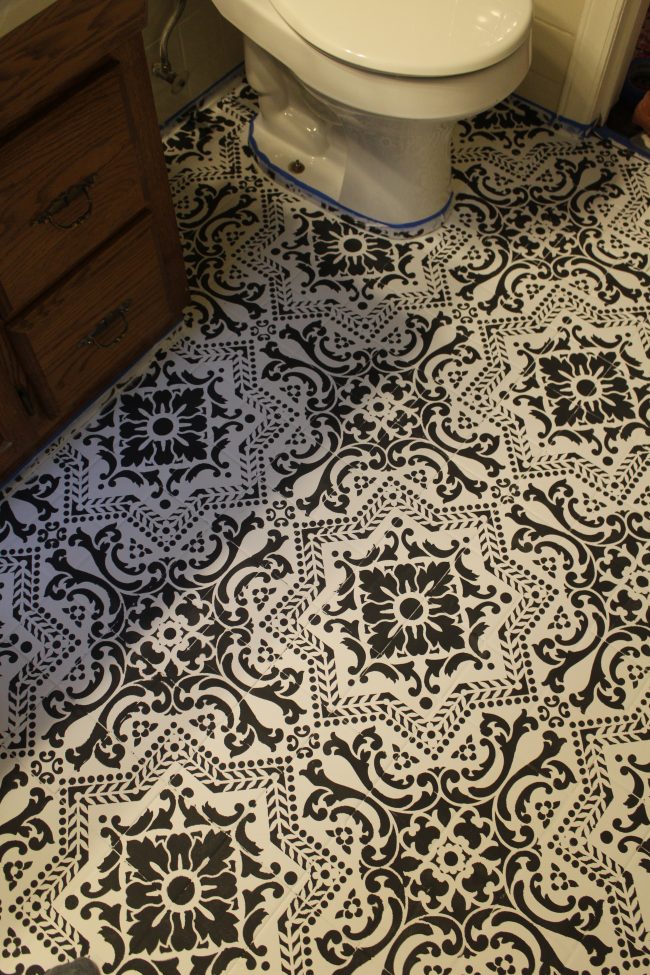
I let everything dry completely overnight, and then the next day I swept the floor to remove any debris and then applied three coats of Rust-Oleum’s protective topcoat, letting each coat dry for two hours before applying the next. It is made specifically for chalk paint – it’s matte and clear! I rolled this one on as well. The can says that it should be brushed on, but when I did that in a small corner, the bristles of the brush scratched at the paint and caused it to smudge a little. So, after touching that up and letting it dry, I used the roller to apply the topcoat.
At first the topcoat will look a little white, but it dries clear and enhances the color of the paint.
Here is the floor after three coats of the topcoat:
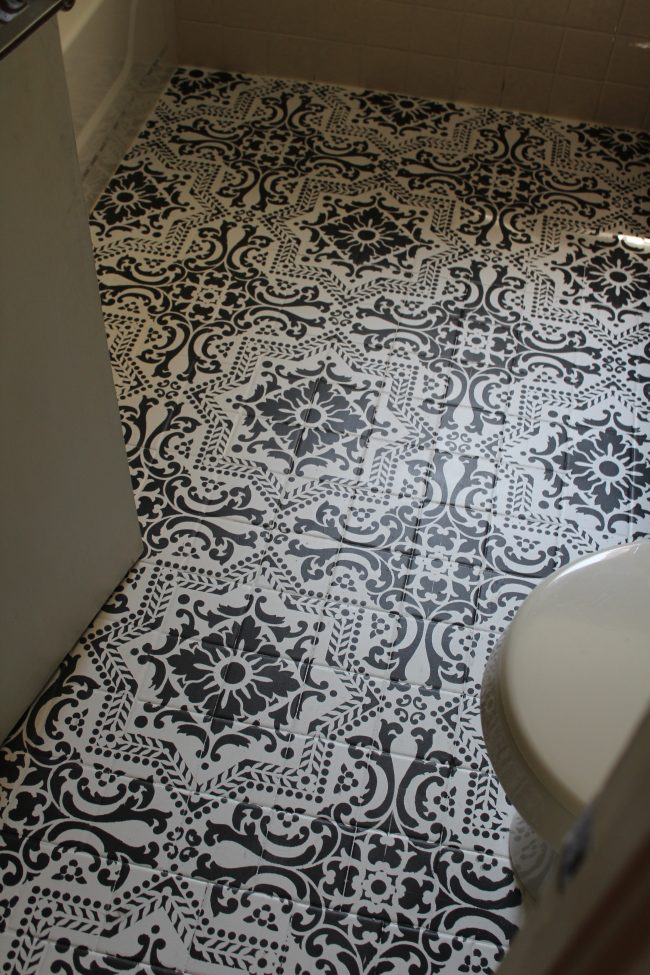
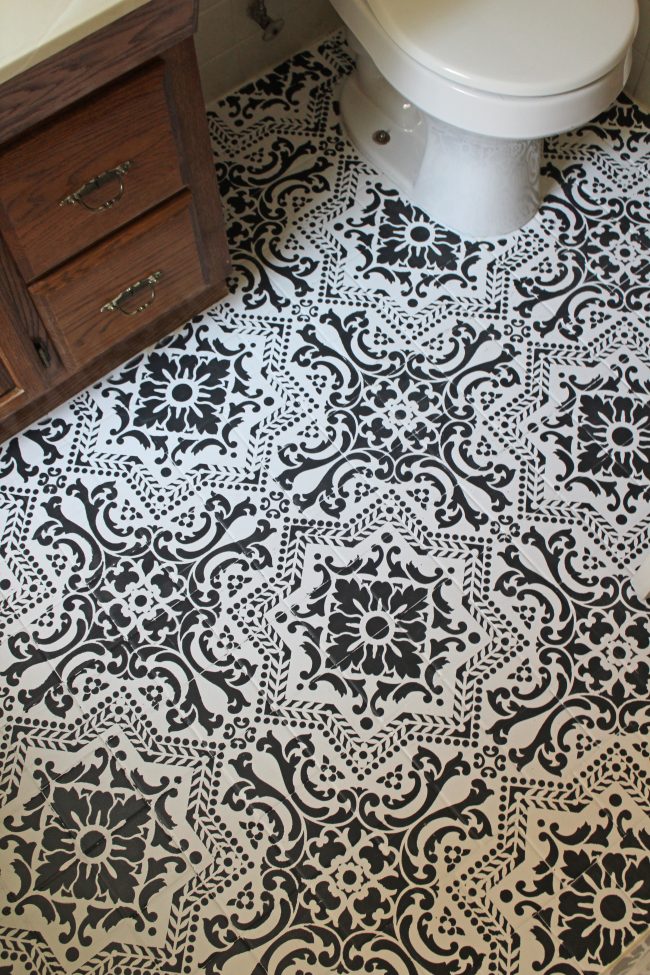
Sidenote: When I peeled off the blue tape from around the perimeter of the room, everything went well UNTIL I removed it from directly in front of the vanity. The paint peeled up a little bit along with the tape, so I’ll need to touch that up. I’m not quite sure why it only happened in that spot! So, if you’re doing this project in your own home just use caution when pulling up tape at the end!
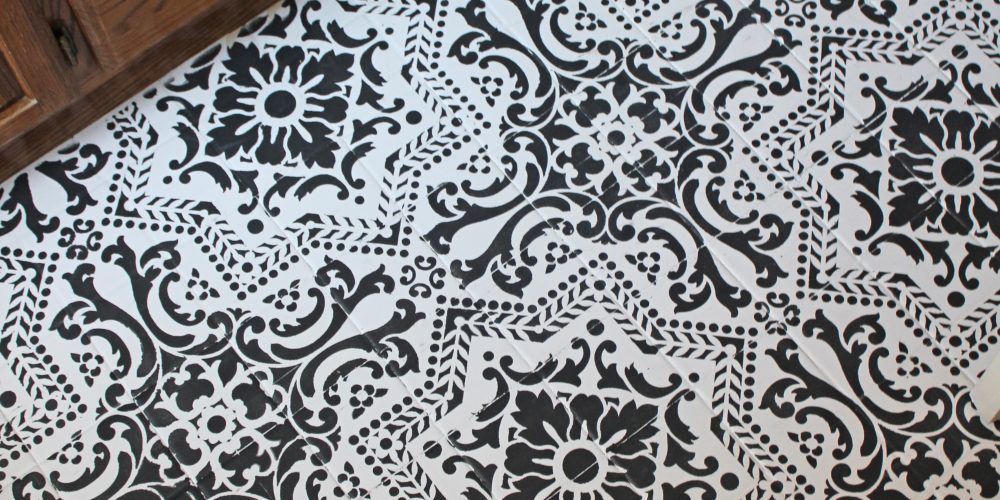
Next, I have plans to pretty up the vanity (stay tuned!) and we will re-paint the walls (see ya, blue!). BUT I am amazed at how dramatically the painted floor changes the look and feel of the room! It looks just like those fancy cement tiles…but costs a LOT less.
EDIT: Check out our painted walls here! No more blue!
What do you think? Would you attempt this? Let me know if you have any questions about the methods I used!
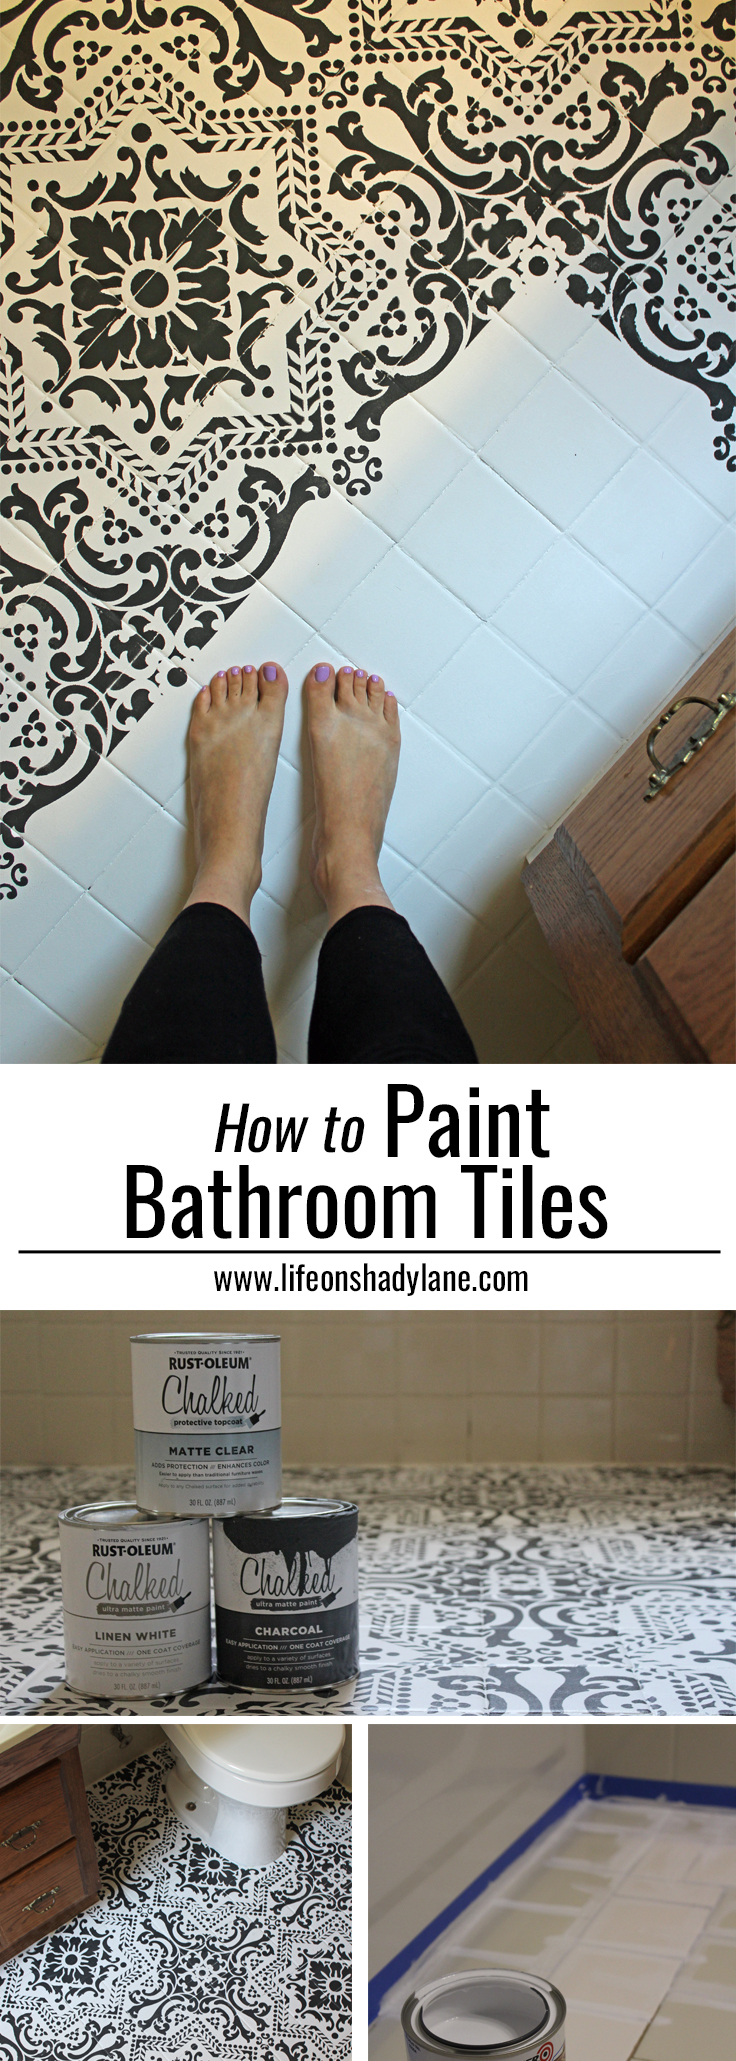
Also, here are a couple of Pins you can use if you want to add one to your Pinterest boards!
Check out more of our home-related projects [here]!
Follow me on Instagram and Pinterest!
I hope you enjoyed this Black and White Stenciled Bathroom Floor blog post! If you did, please consider leaving a comment! OR feel free to ask any questions – I love to hear from you guys!


Genius! It looks amazing! I love it.
Thank you so much Kate!!!
This just saved my life and a whole lot of time and money THANK YOU ? ?
This just saved my life and a whole lot of time and money THANK YOU ? ?
haha! I’m so glad!!!
I Katie your new bathrm looks beautiful. I am going to refresh my bathrm downstairs. I was wondering can I stencil over linoleum?? If yes I will send you the before & afternoon. Thank You!
Hi Barbara,
I haven’t stenciled over linoleum, but I would imagine you could. Would love to see before and afters!
I saw a previous post that painted over linoleum but they used a rotary sander over floor to take sheen off first and filler for any gouges in floor then they primed and painted. I am going to attempt this this weekend but still reading post to determine which paint I will use.
Great idea and you did such a good job! So, will you come paint the white tile in our condo??? Please -:) I think stenciling might be too much, but, if I could paint it darker with matte finish I might not hate it so much!
You given me an idea! stenciling might be too much, but, if I could paint white tile darker with matte finish I might not hate it so much!
Ooooh yes that’s a great idea!!!! Would look awesome!
LOVE! I have been looking for something like this for my kitchen back splash. Thank you!
OH good so glad you found the post useful! If you decide to paint your kitchen backsplash, I’d LOVE to see pictures!!! :) :)
This looks great! I’m definitely going to try this. Did you use a special primer or can you advise what primer you used? Thanks so much!
Hi Michelle, thank you so much!! I used Zinsser primer – you can find it here (affiliate link) Let me know if you have any other questions!! :)
When you say you used a roller, was it like a 4″ foam roller? I want to try this in my bathroom, and if it goes well, my kitchen as well. I feel like a roller will speed things along for me
Hey Alana, yep it was a 4″ foam roller! Just be super careful with how much paint you load onto the roller – more is NOT a good thing! It will look a lot more crisp if you use less paint. :)
Hi Megan, loved reading your tips on stenciling floors. Thanks for all of this great information!
We recently purchased a small home that we’re going to use as an Airbnb, so I’m looking at stenciling the kitchen floors to save money. How are your bathroom floors holding up? Would you still recommend Rust-Oleum? Thanks! :-)
Hi Megan,
I am DEFINITELY going to do this in my old and tiny guest loo. Just a question: how did you actually set the stencils around the toilet bowl? Thank you :-)
Hi Nicole! The stencil I used was flexible so I was able to just bend it right up next to the toilet and paint!!
You are the bomb! I am going to think of something to stencil in my home. Thx for the design tips.
Of course, Sharon! So glad you enjoyed the post.
How did the painted floor hold up? I have painted my bathroom floor with chalk paint and now I want to find the best protective clear coat I can to keep all this hard work intact.
Heather, I published a post about how the floors were holding up here: https://lifeonshadylane.com/2017/08/an-update-on-our-stenciled-bathroom-floor/ Let me know if you have any questions at all!!
I would recommend an oil based primer on any shiny surfaces. This seals off the surface and works very well on varnished paneling, so I would try it on tile. I am going to try this on my bathroom tub surround. I’m not a fan of chalk paint, but if the matte finish is what you like on your floor, I think I would use a matte poly finish made for floors which is probably stronger than the finish made for the chalk paint.
Yes so smart! I’d love to see your tub when you’re finished – feel free to email me a photo! :)
hello :)
how Your floor look after six months? Have You got any problems with cleaning?
Hi Beti! I shared an update on the floor in another blog post. It’s linked here on this post. Let me know if you need help finding it! :)
Looks amazing! I do have a question for you. Where did you buy your stencil? Thanks!
Hi Stephanie, thanks so much for stopping by! I linked to the exact stencil I used in the post. It is from Royal Design Studio!
Where did you purchase your stencil from.
Hi Sue! I linked directly to the stencil that I used in the post – it is from Royal Design Studio! Let me know if you have any questions at all!
Hi Megan
Thank you for your detailed instructions ….I just finished my bathroom floor using rustoleum chalk paints and stensils from Royal Design Studio!
It turned out amazing! One thing I did different was I removed the toilet so it was easier to paint the floor!
Oh wow, I admire your determination – I didn’t have the motivation to remove the toilet, so I just painted around it!! Send me a picture of your floor, I’d love to check it out!! lifeonshadylane@gmail.com
I have a small bathroom upstairs. Part tile and carpet. If I took up carpet it would be cement I think.
Do I have to stencil or could I just paint the tile part or could I do both? Your floor looks great!
Cathy
Thank you so much Cathy! I’m having trouble envisioning what you mean – feel free to email me a picture, and that might help! lifeonshadylane@gmail.com
Hi, I’d love to know how this has held up. Has any of the color started to fade or chip?
Thanks!
Hey Alyssa! I actually did a follow up post – it’s linked here on this post. Let me know if you have trouble finding it!
hey there, did you have to let each stenciled part of the floor dry before doing the next ? I can figure how else you could do w out smearing the paint..
Hi Kait! I did maybe 2 or 3 at a time and then let them dry!
This is a very smart idea. I really want to change my kitchen back splash and needed help. This is great, will try the stenciling.
Thanks very much ladies.
Colletta
Awesome! Let me know how it goes, Colletta!
Can I do this on concrete floors? They are stained and sealed.
Hi Cher,
I’m not quite sure actually. I know I have seen it done on concrete floors, so my guess would be yes! I just haven’t done it myself.
What did you do around toilet and around edge of walls where a full stencil wouldn’t fit? Sorry if it has already been asked and I missed it?
Hey Kelly! The stencil I used was flexible, so I just pushed it right up into the edges around the toilet/walls and it worked great!
Where did you start with the stencil, in the center of the bathroom floor?
Yes! In the middle!
Hello, My Fiance loves this idea and I think it looks great. I couldn’t find your post on the upkeep. I have a lot of tile, probably 600 square feet. I’d hate to put it in a high traffic area if it requires a lot of work to keep up with. How has it faired over time?
Hi Charles, thank you so much! I shared an update on the floor here: https://lifeonshadylane.com/2017/08/an-update-on-our-stenciled-bathroom-floor/
Any tips when stenciling around the vanity’s? Looks like it could get a bit messy? PS Love it and youve certainly inspired me :)
Hey Ellie! Thanks so much – I’m glad you’re inspired by this post! The stencil I used was flexible so it could bend and fit right into corners. Worked like a charm!
HI! I just stenciled the first tile in my bathroom and the bleed is awful! I don’t think I can do it if it’s going to bleed on every tile like this…..any tips? Was thinking spray adhesive but don’t want it to peel up the black paint already on the tile! Help!
Oh no! I’m so sorry Lara, I just saw this. You’ll get bleeding if you don’t have a small enough amount of paint on your brush. You need the TINIEST amount! More seems like it’ll make the project go faster, but it will just cause paint bleeding!
Let me know if that tactic helps!
This looks gorgeous! So did you paint the primer right over the grout? Any tips for lining the stencil up around vanity where the whole stencil does not fit? How is it holding up?
Thanks!
Hi Tiffany, thank you so much! I did paint primer right over the grout and used a flexible stencil so I could push it/bend it right up into the corners/edges of the room.
The tiles I painted on were slick, not porous at all. So the paint did start to peel up (I linked an updated post!) – my advice would be to use a different primer OR sand the tile before beginning your stencil project!
Absolutely LOVE your floor!!
Question – I have a small hexagon tile floor – will it that work with these stencils? Is there a product I can use to smooth out the surface first?
Thanks!
Hi Lisa! I’d try a tile deglosser or just sanding first. And I think the stencils would work great on your floor!