Microblading eyebrows before & after ! Plus, a Q & A with my microblading artist, to answer all of the questions you might have about the process.
I have wanted to have my eyebrows microbladed for years. I’m not kidding – years! So when I discovered Shannon at Brow Love here in Kansas City, I knew it was time. She does the prettiest, most natural looking brows and her communication with the customer, safety procedures, and knowledge is just so impressive!
This post may contain affiliate links
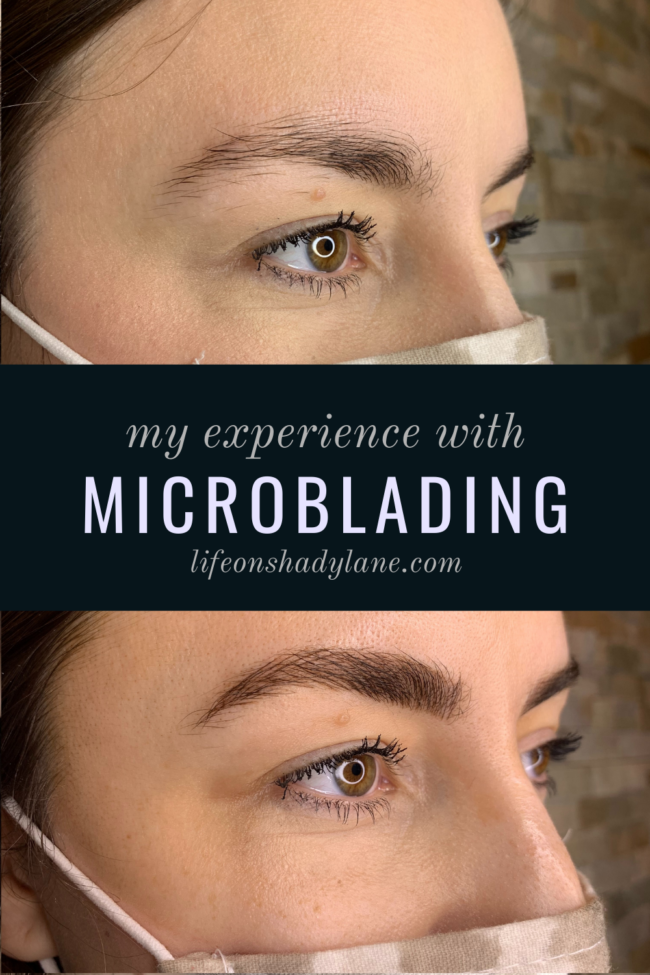
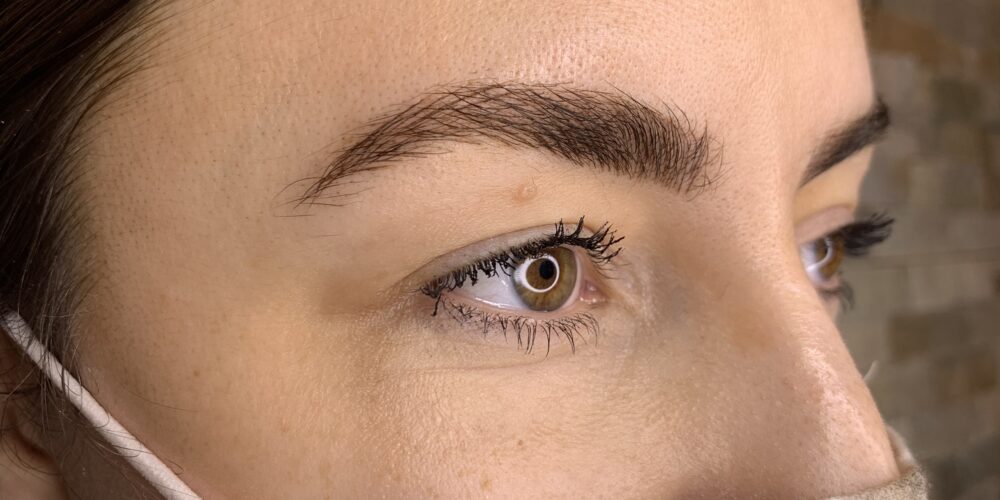
Microblading eyebrows before and after – such a drastic difference, right?! I LOVE how it turned out!
Keep reading to see the entire process.
————–
I hope you’ll check out some of my other posts while you’re here, too!
See my DIY projects and inspiration [here]
Check out a home tour [here]
Check out some fashion posts [here]
Here’s a quick before and after:
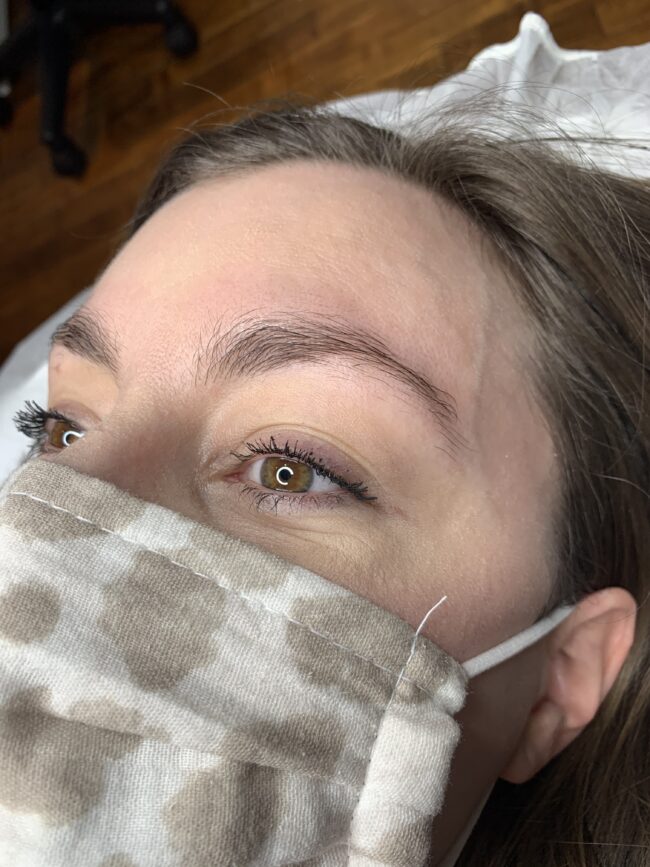
I honestly can’t believe I’m posting this “before” photo without any makeup at all. It’s a little frightening to look at! LOL. All in the name of research, right? I wanted this post to be as informational as possible for you – always striving to be a great resource! ;)
About a week before my microblading appointment, I asked you over on Instagram to send in any questions you might have about microblading. I’m obviously new to the process (I’ve never done it before!), but Shannon was so kind and said she’d answer any and all questions.
So before we begin…a little Q & A about microblading:
- First and foremost: what IS microblading?
Microblading is performed by placing fine, hair-like strokes to form a brow pattern with a small blade. When done correctly, the strokes are placed at the dermal layer of the skin, a higher level than a traditional tattoo which is why it is semi-permanent and will fade over time.
2. How much is it?!
$450 and that includes the consult, initial appointment and 8-week touch up. You won’t ever pay that again and your annual color boost session is $250.
3. How long does it take to heal?
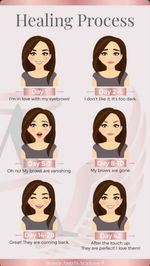
There are many phases of healing, as 7 days will allow you to resume normal activities like getting them wet and sweating. However, there will be some flaking as the strokes cause pin-point bleeding (think paper cut or cat scratch) so those “scabs” are so tiny they look like little flakes. You will need to use the aftercare products given to you to help with healing.
Here is a helpful graphic:
4. How do you know your microblading artist is certified/licensed/safe?
You want to make sure they have completed Microblading training with a licensed academy. Look at the academy’s website. Does it look reputable? And ask for a picture of their certificate! Look closely that it says Certified Graduate and not “Certificate of Attendance” as all that means is they showed up and sat through a course. Finally, make sure that if they are practicing in the state of Missouri that they are NOT offering powder brows, lip blushing, or any other service using a machine unless they have a license with the state to do so. Many artists do this illegally. Using a machine (offering powder brows) requires an apprenticeship in MO and I have been accepted into and will be completing one soon, which is why I only offer Microblading, Manual Shading, and Removal at the moment as all are allowed under Missouri law. Phew!❤️
5. How often should you do touch up after the first session?
One touch up at 8 weeks (free) and color boost at one year. If your retention is good (and we can consult on that at the one year mark), you can do your color boost anywhere from 1-3 years. 3 would be the longest one could go and that would be more for a mature client with dry skin. Younger and more normal skin would be closer to one year to 18 months, and oily skin fades the quickest and would need to come back right at a year.❤️
6. Is it permanent?
Nope! Semi-permanent! If a Microblading artist is going way too deep (into the hypodermis) then yes it can be permanent and that is not Microblading at the point, that’s a tattoo! Look at the artist’s work and healed work and reviews. If the strokes look clean and crisp (ex no thicker than a hair) then they are not working too deep. ??❤️
7. Do I need to hall full brows naturally for microblading to look good on me?
Microblading can enhance all brow shapes! Most people seeking the service lack full brows. I always ask for photos and we consult via DM which saves you a trip in (I only do in-person consults if you have previous PMU (permanent makeup). I adjust my pattern based on your goals but also what you have. The first portion of the appointment is Mapping and that’s when I create an outline based on your unique face shape and bone structure. This will create the most flattering shape for YOU. I always give my clients final approval of the shape before proceeding; it’s truly a collaborative process.❤️
8. How do you make sure you get the right color/shade?
The best Microblading artists are taught color theory and also use the best line of pigments. I have been trained on the Fitzpatrick scale to help determine a color that’s best for you, and I use Beauty Angels pigments that are very true to color and will not fade to grey or red. I also match the brow hair, not the head hair. This creates the most natural look. I also like to ask my clients what color they use to fill them in when doing their makeup, because that also gives me insight into how you like them to look.❤️
9. Does it hurt?
Many people say it’s about a 3 on a scale of 1-10. It feels like a cat scratch, just over and over for a bit. Something to mention that has not been asked…I do not pre-numb. MANY artists do and I’ll tell you why I don’t. Numbing cream causes blood to rush to the area and completely changes the composition of the skin. It becomes rubbery and thick. Not a great canvas for creating those fine, hair-like stroke we’re after. Not only that, pre-numbing feels different to the artist so they don’t get a sense of that “sweet spot” and then they can go too deep. I complete my first pass without any numbing and then after that THEN I apply 5% lidocaine and the second pass is more like a 1-2. It’s a little more discomfort in the beginning (again, like a 3) for better results in the long-run. This is how Beauty Angels Academy has trained me to Microblade and I think it produces the best results.❤️
10. Do you have a discount code?!
Yes! MEGAN15 ??❤️ (Good for appointments booked with Shannon at Brow Love here in Kansas City during the month of JANUARY 2020!)
What impressed me most about Shannon was her collaborative efforts. She took the time to ask me ahead of time (before I even went in for the appointment) what my goals were, what I wanted my eyebrows to look like, etc. Plus – her safety procedures are super impressive, especially in the middle of a pandemic. She goes above and beyond to ensure everyone is safe!
Click here to book a session with Brow Love
Microblading steps:
The first thing Shannon at Brow Love did was mapping. This step took about 45 minutes, and was the coolest. thing. ever. She used pigmented string, a golden ratio tool, and a caliper for measuring distances between points. All of this was to ensure the finished product came out symmetrical and perfectly suited for my bone structure + face.
After she was finished, she checked her work with a really cool app she has to get the points even more precise. Lots of microblading artists don’t use this additional step – I really appreciated the extra time and effort Shannon put in to get my brows looking perfect!
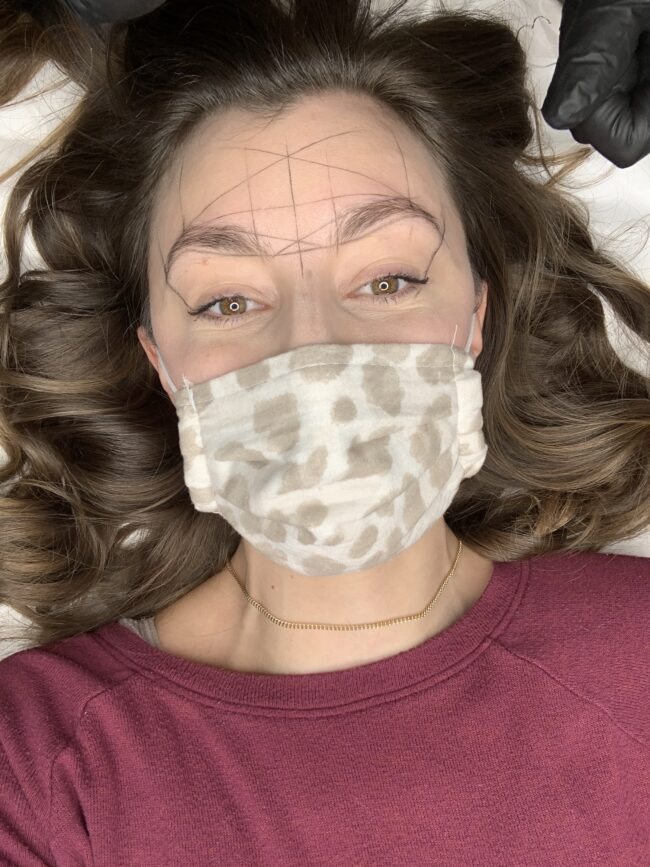
Once the mapping step was finished, she cleaned off all of the extra lines, leaving just the outline of my brows. Then, she used a surgical marker to mark the outline (so we didn’t rub off any of those precise lines she had just created!).
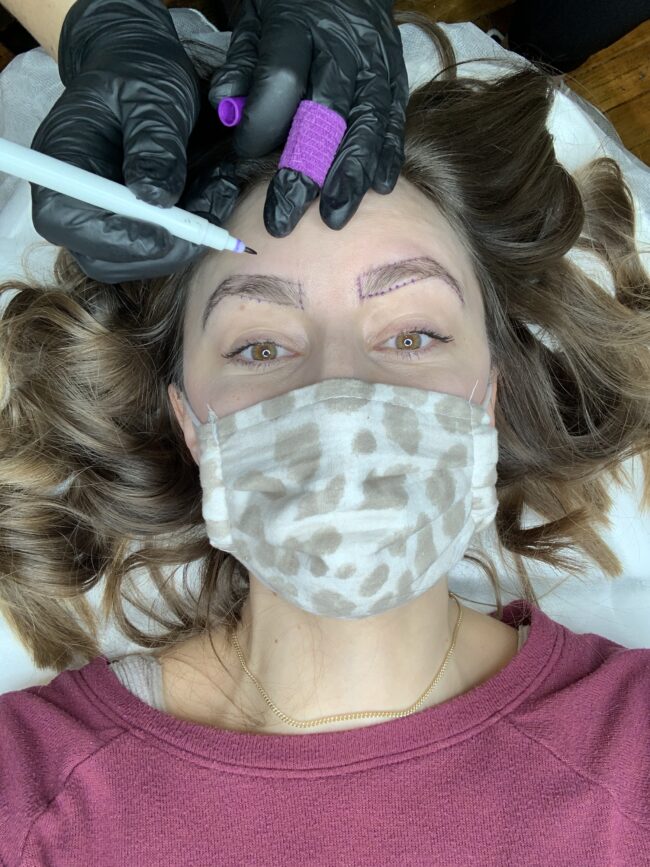
Then – we started microblading!
For the first pass, Shannon doesn’t use any numbing cream. Lots of microblading artists do and tout their “pain free microblading” BUT after hearing Shannon’s reasoning, I was glad she didn’t!
When numbing cream is applied, the skin thickens and you’re not able to get as precise of a line. This results in less natural looking brows. And to be honest, I’d rather have a little bit of pain in the beginning and end up with pretty, natural-looking brows in the end!
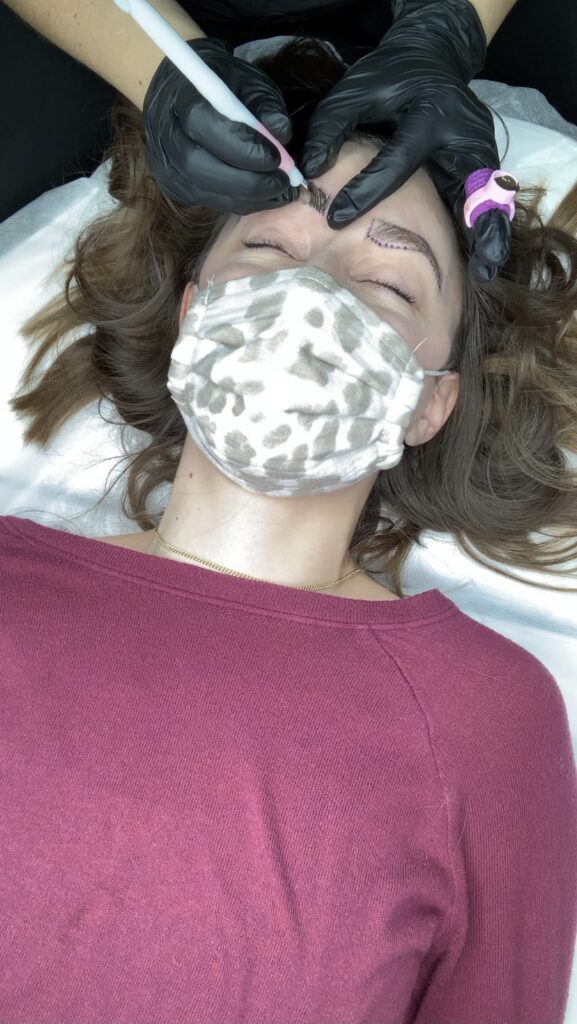
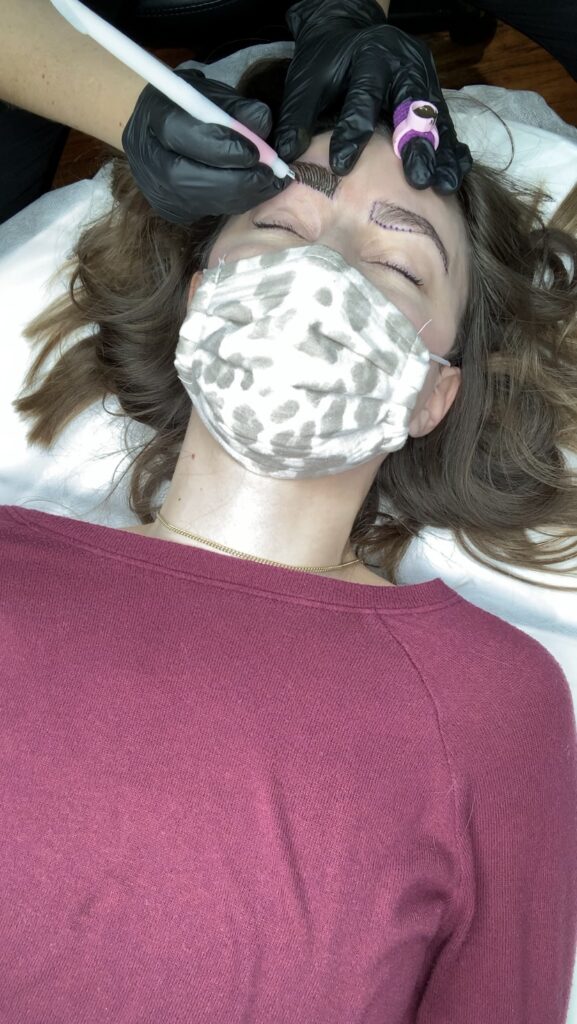
Once the first pass was done, she applies the pigment over the whole brow – this step is called “masking” and allows the pigment to saturate.
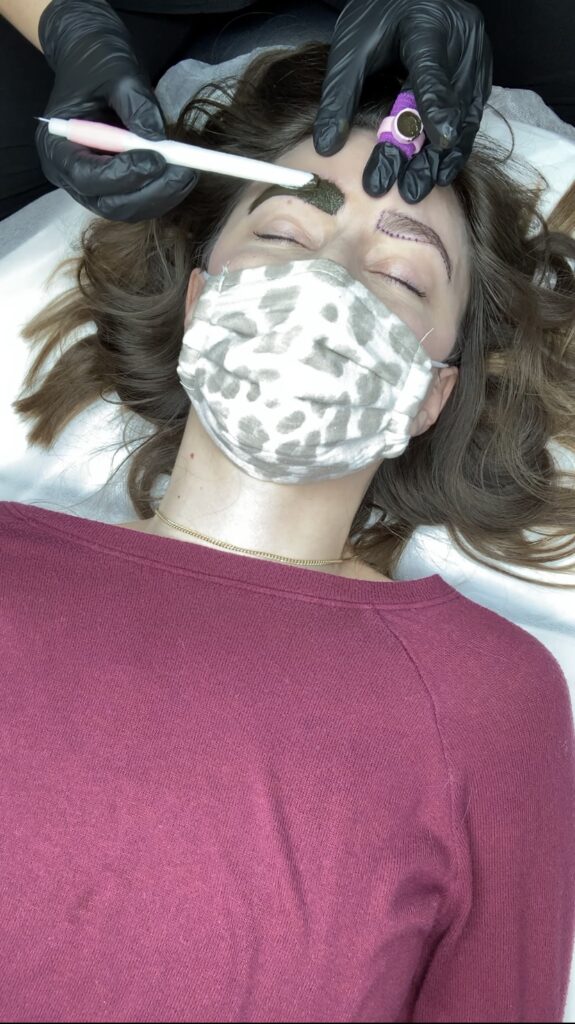
She repeats on the next brow – microblading, and then masking. Once the masking is finished, she wipes off the pigment with lidocaine cream. This numbs the area, making the second pass less painful. ;)
The second pass is also done with a more fine needle.
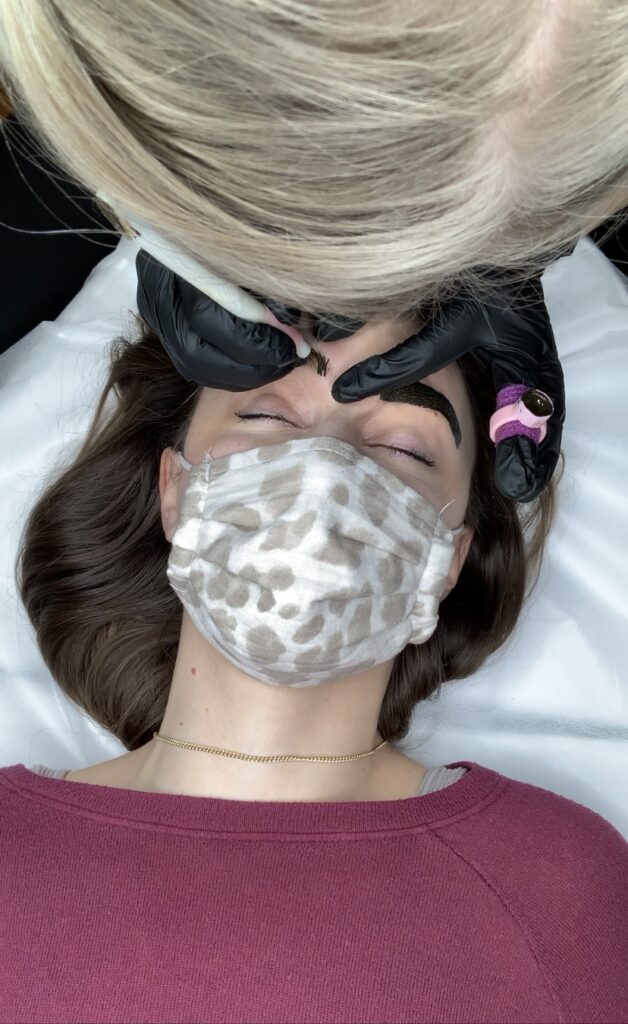
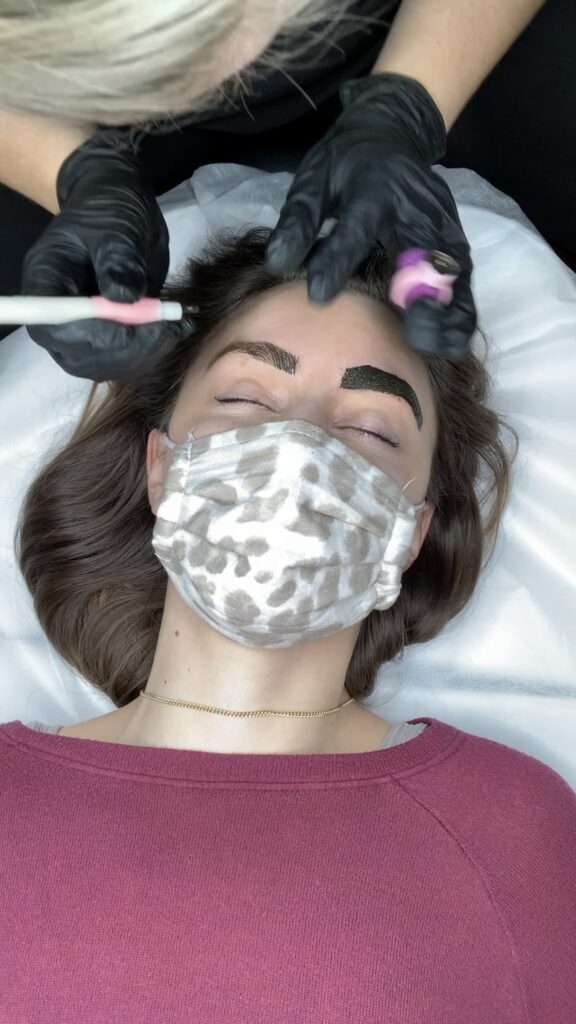
Once two passes were finished, Shannon went in and filled in any spots that were still sparse.
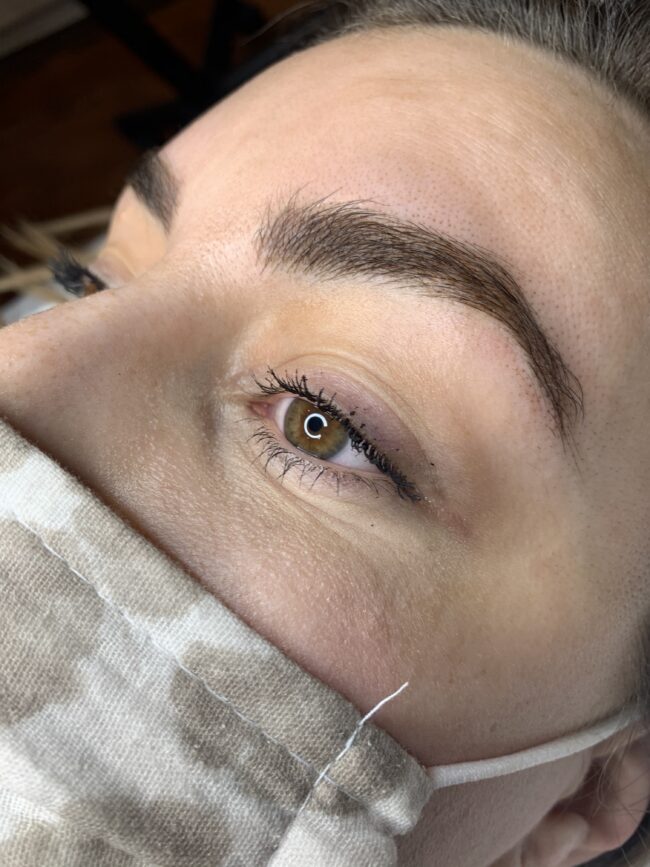
Microblading eyebrows before and after :
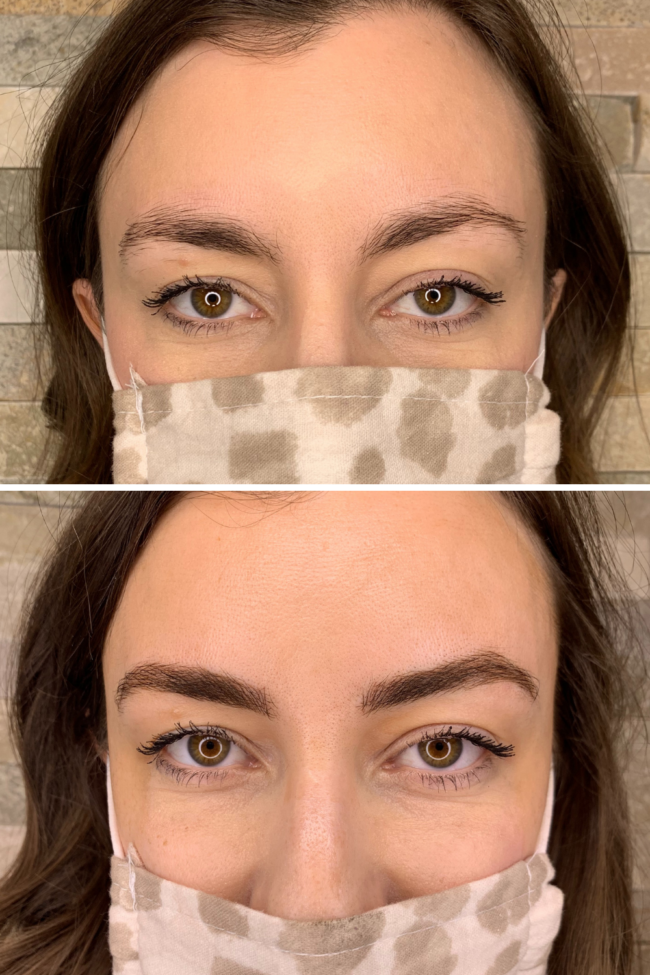
I honestly can’t believe I get to wake up with pretty eyebrows every day! It made such a HUGE difference.
I’m currently on DAY TWO of the healing process. From what I understand, this is the day my eyebrows will look the darkest (because the ink is oxidizing). They’ll start to fade tomorrow, then come back around day 14.
Then, in 8 weeks I’ll go back for a touch-up (included in the initial $450 you pay!) and they’ll be perfected!
I can’t wait to show you what my microblading eyebrows before and after looks like once my touch-up is over.
Here’s what DAY TWO of microblading looks like:
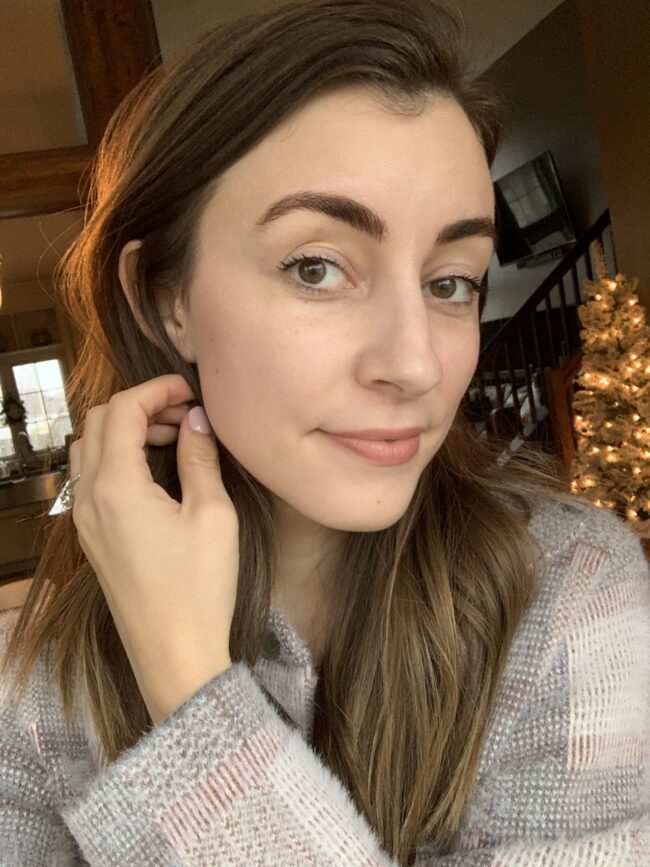
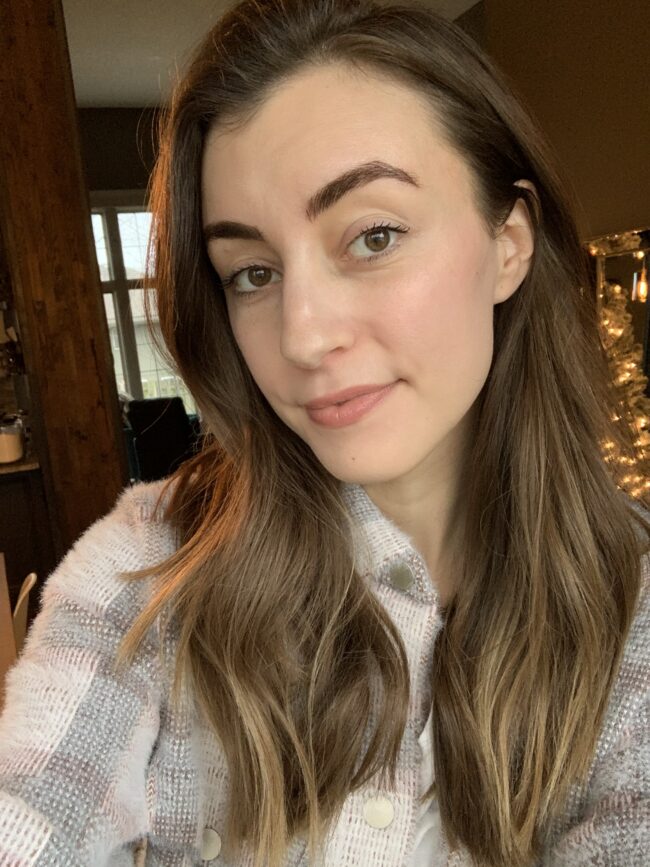
On day 5, my brows started to flake – they were itchy, but it wasn’t horrible! The flaking is normal. It’s the tiny scabs flaking off (which means you’re on your way to healing!)
Day 7 – Brows almost healed but still flaking. I helped them a little bit with a small eyebrow brush, just to remove the flakes that were already off. About 30% lighter in color! *I hear that the color will start to return a bit after a few weeks…and then I’ll go in for my touch-up at about 8 weeks!
I hope you enjoyed this microblading eyebrows before and after blog post! Stay tuned for more updates. :)
Click here to book a session with Brow Love
————–
I hope you’ll check out some of my other posts while you’re here, too!
See my DIY projects and inspiration [here]
Check out a home tour [here]
Check out some fashion posts [here]

