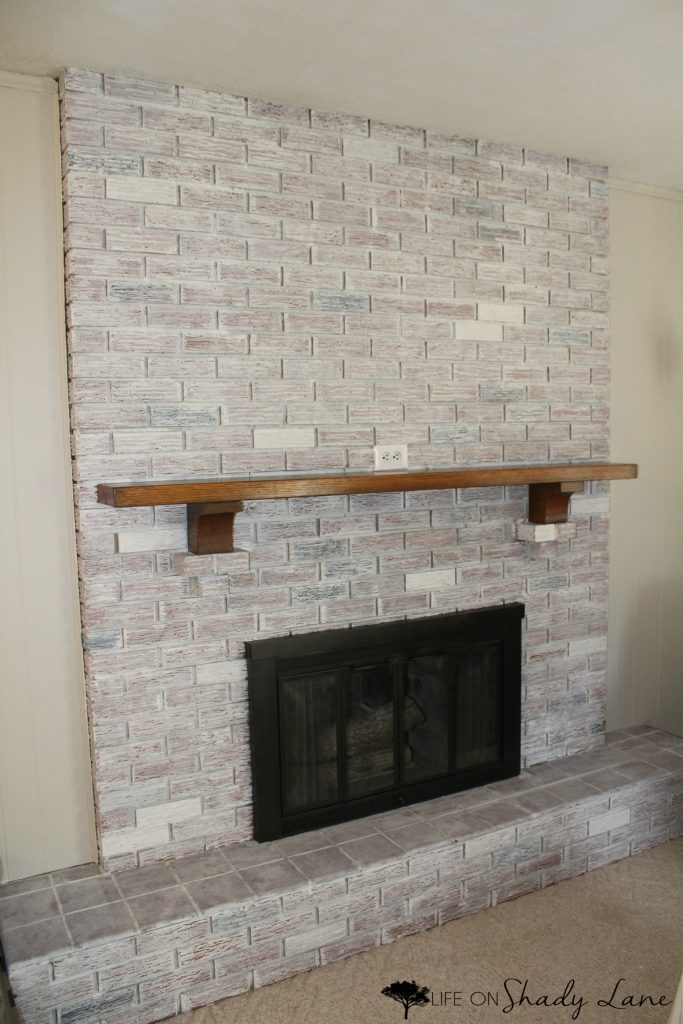
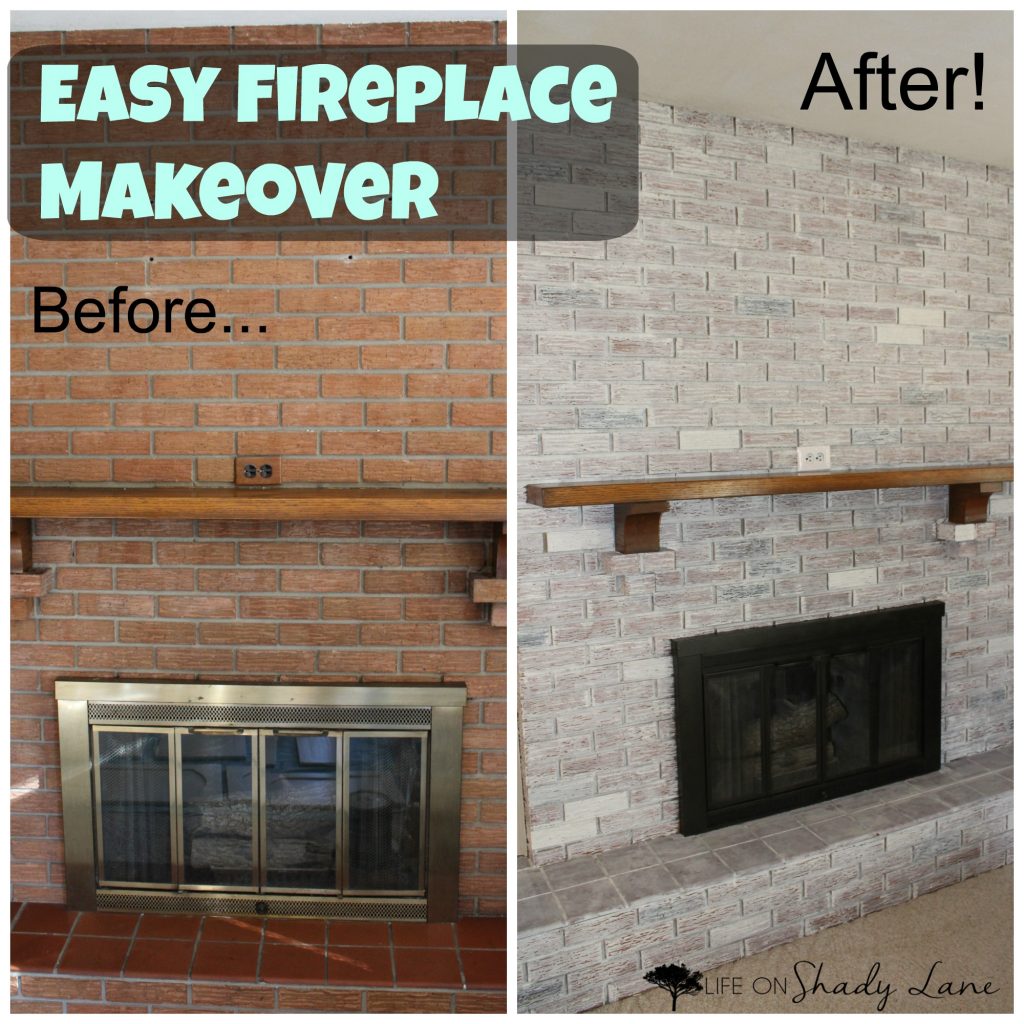
How to Whitewash a Brick Fireplace – a step by step guide to making an easy and inexpensive change to your brick fireplace!
This post may contain affiliate links
I have been meaning to get to this post for days weeks. I’m still trying to figure out this whole motherhood thing, and sometimes (quite often), finding the time tfo write a blog post is a little difficult. However, right now, baby Henry is taking a nap and I have a few minutes to myself. Woohoo!
*EDIT: This has, by far, been one of my post popular blog posts and one of the most pinned images on Pinterest. Thank you everyone for reading! If you’re here from Pinterest, WELCOME and thank you for stopping by! If you don’t already follow me on Pinterest, please consider doing so – I pin all kinds of awesome stuff! I’m on Instagram, too!
I hope you’ll check out some of my other posts while you’re here, too!
See more of my DIY projects and inspiration [here]
Check out a home tour [here] *and we’ve moved! see a new home tour [here]
Check out some fashion posts [here]
We knew we wanted to makeover our fireplace as part of our home’s “renovation” and after considering all options (tiling over it, painting it, etc.), we decided to try whitewashing it. BUT…the “brick” on the fireplace is not even real brick. I’m not sure what it is, but we were concerned about the whitewash coming out right. So we decided that if we tried and failed, we would just paint over the entire thing an opaque white color. And if that failed, we could always tile over it. I am learning that, with cosmetic changes in your home, things are always fixable. Fixing your mistakes will probably mean spending a little more money, but taking risks and learning along the way is what makes it an adventure. Right? Right.
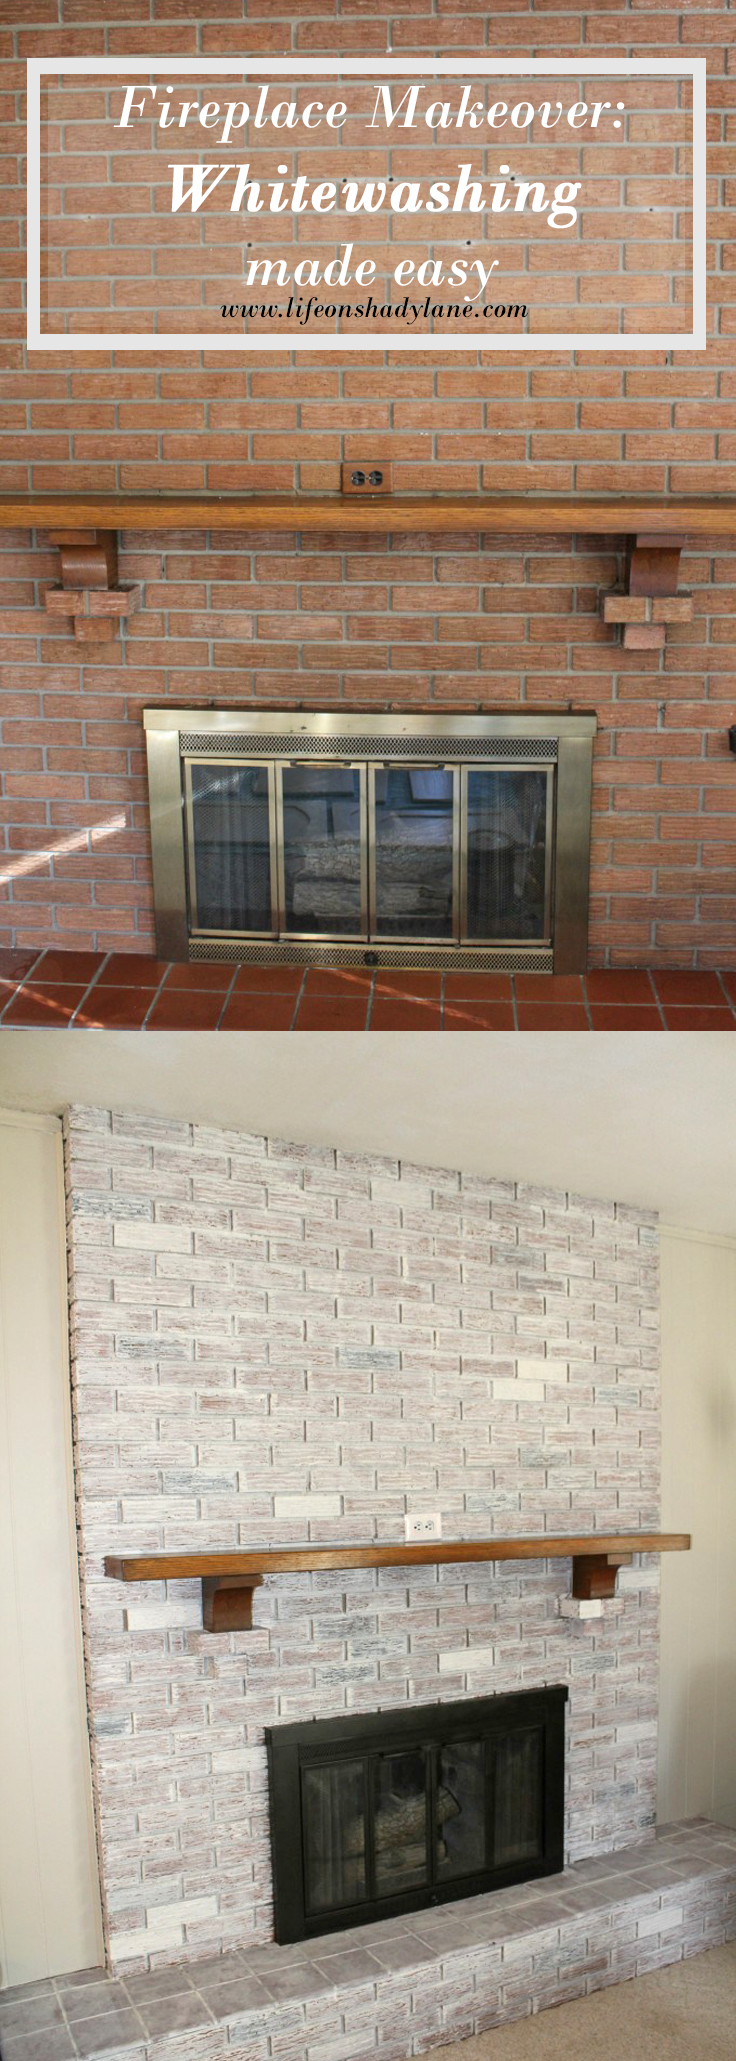
Materials Needed
- White paint
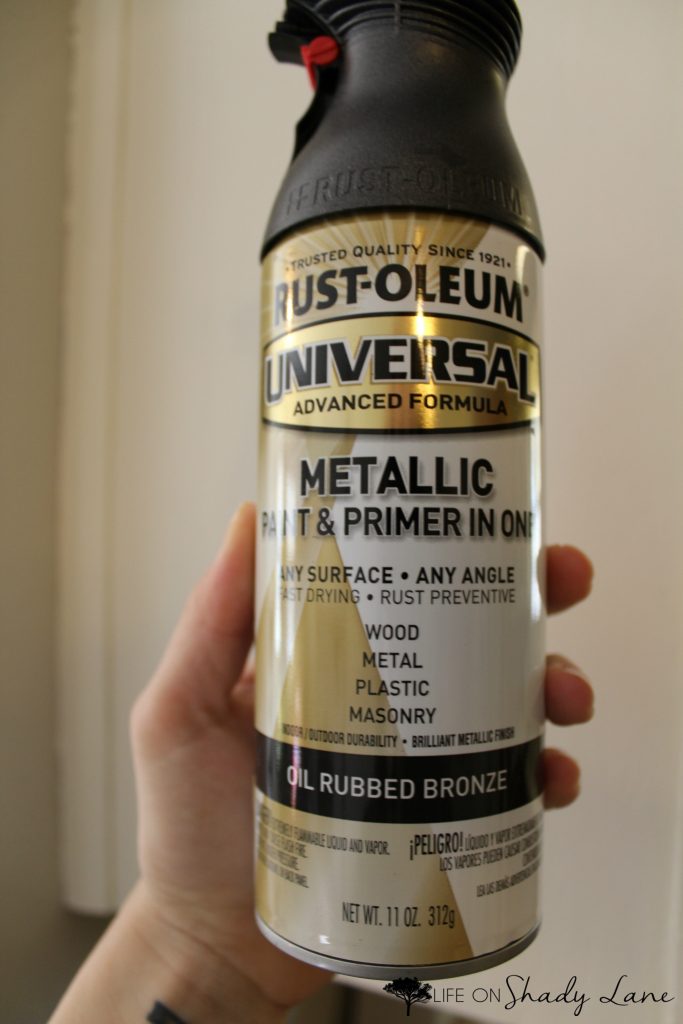
- Dark spray paint (we used this one)
- Gray paint
- Gloves (I like these disposable ones)
- Sandpaper (buy here)
- Paper towels or an old rag that you can throw away
This fireplace makeover cost us a grand total of about $14. We already owned white paint, so all we needed to buy was the spray paint and gray paint.
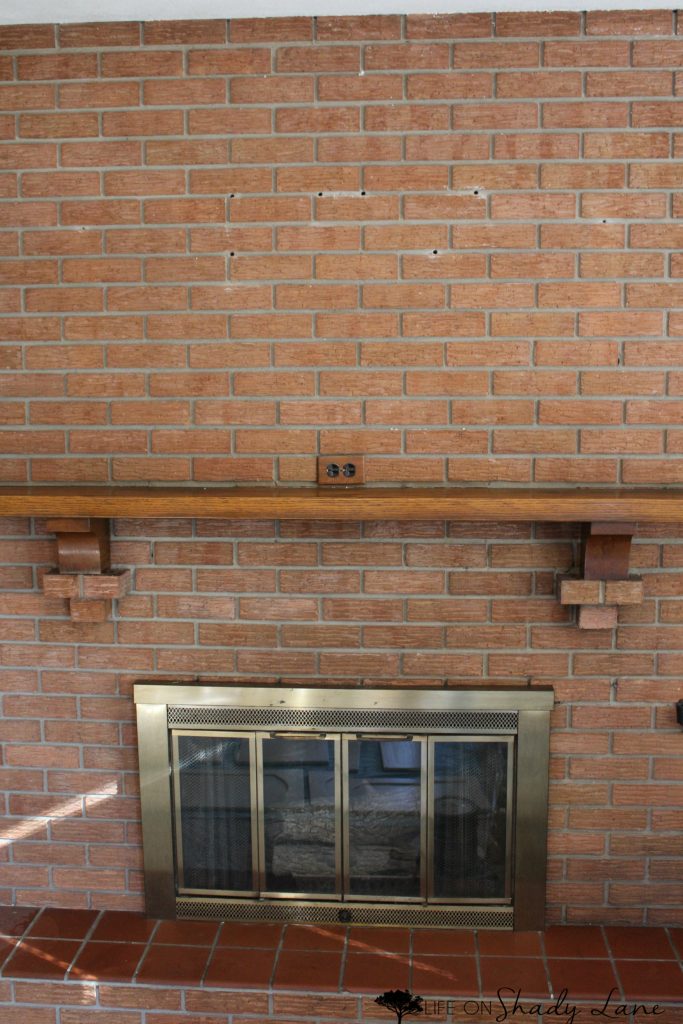
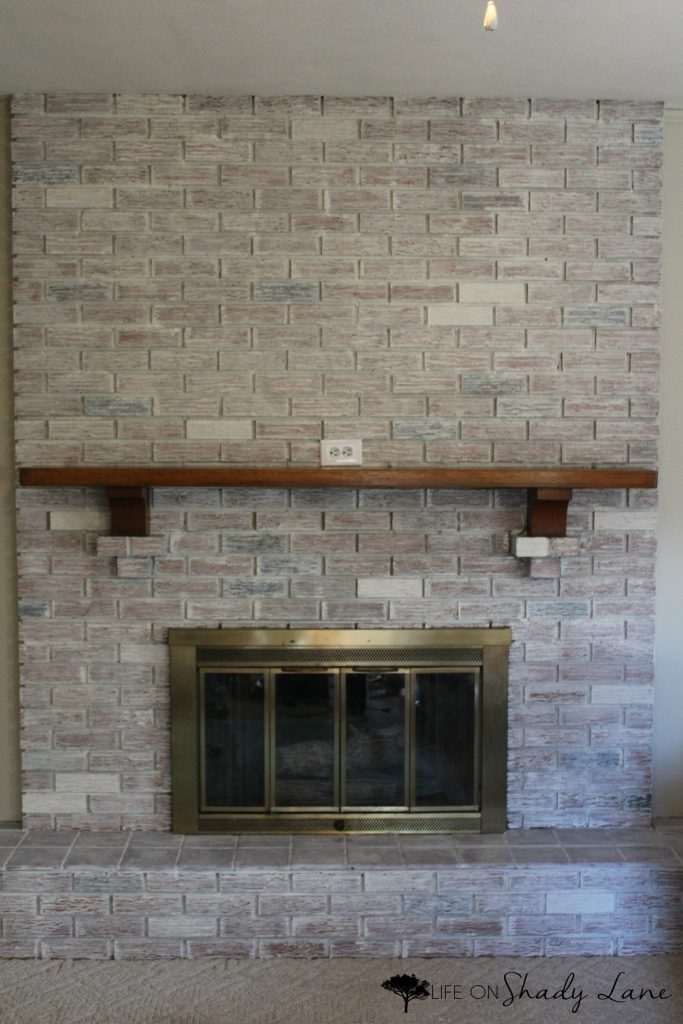
OK so…here was our fireplace before. As you can see, there were some pretty sizable holes where the previous owners had hung their TV mount. We pulled out the anchors and were left with this (below). We just filled them with a little spackle – easy fix!
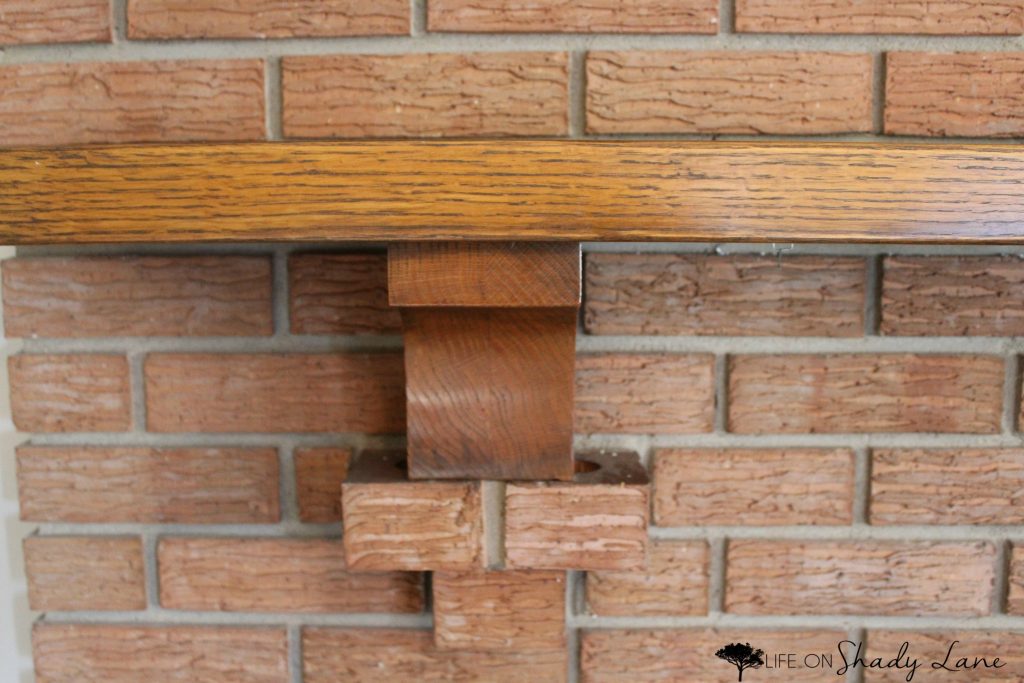
Like I mentioned, the “brick” is not real brick. Here’s a closeup:
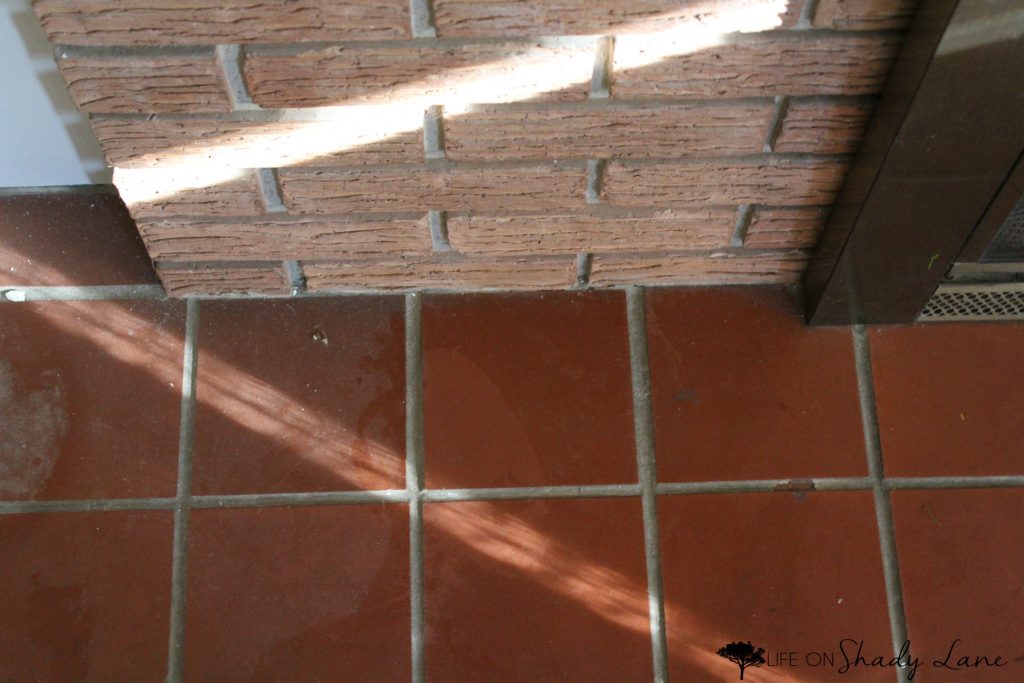
Also, the hearth was this terrible red tile. We weren’t exactly sure what to do with it, so we decided to go ahead with painting the brick and worry about that tile later. Please pardon our dust.
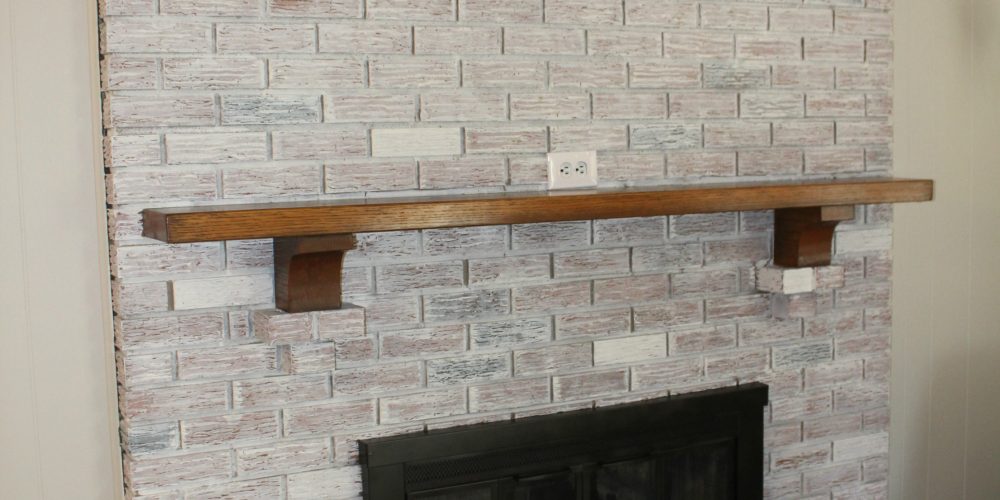
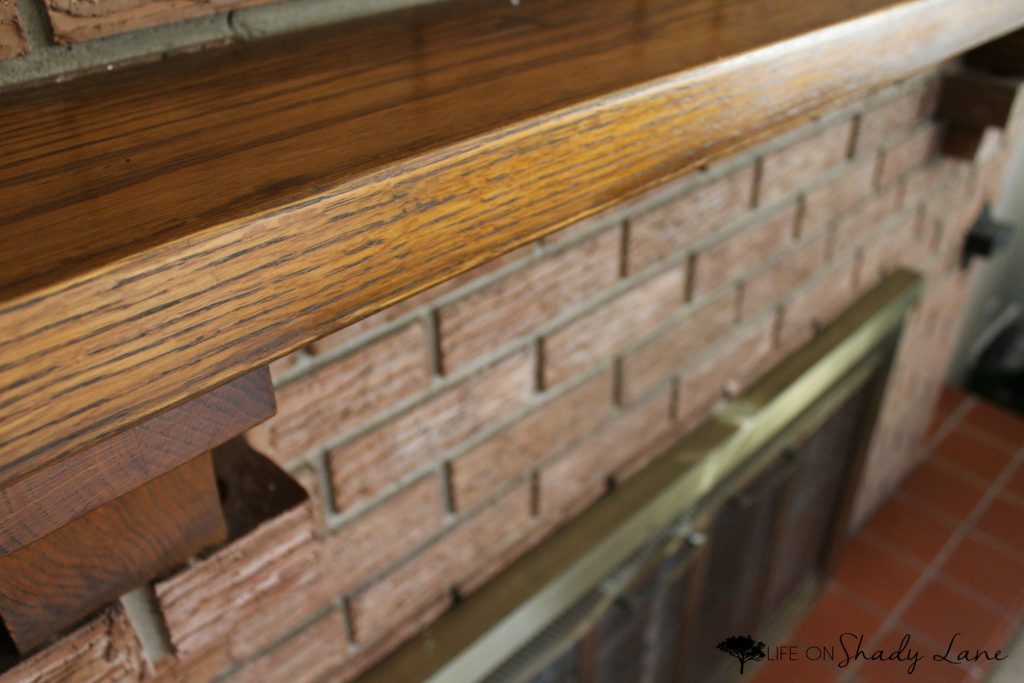
Here’s a close-up of the mantle. We still haven’t done anything to it, but we think that we’ll probably stain it a darker color (maybe the same color that we stained our floors?).
Here’s how we did the makeover:
(Make sure your fireplace is free of any dust/debris before you begin!)
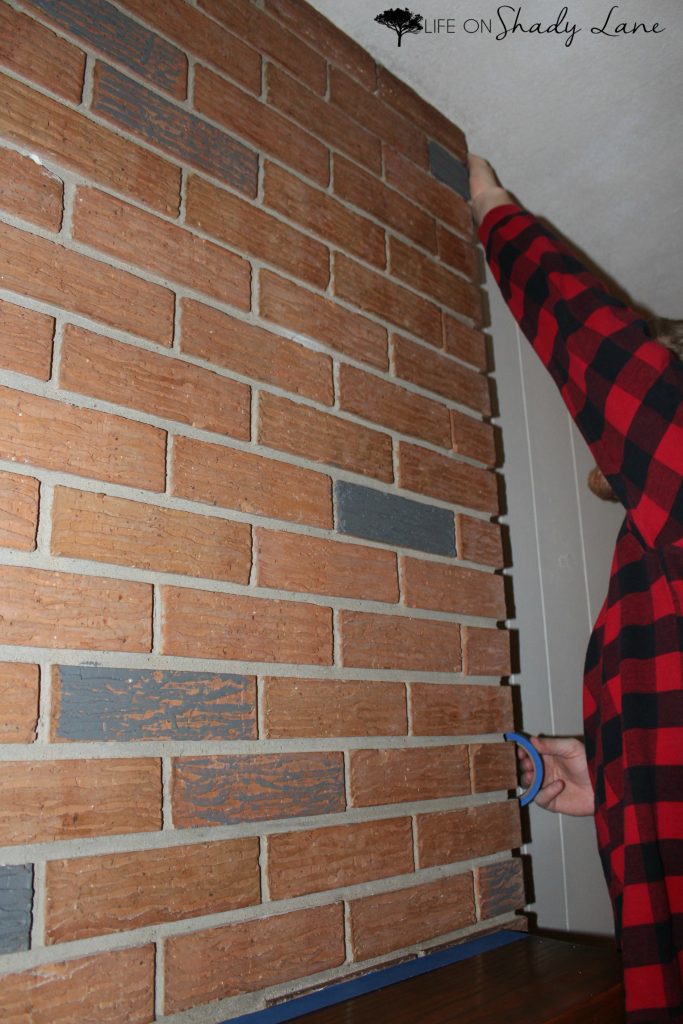
Step 1: Paint random bricks gray. We did some lightly and some more opaque. Then, tape the edges so you don’t get any paint on the walls or mantel when you go over everything with the white paint. Make sure you let the gray bricks dry before you move on to step 2.
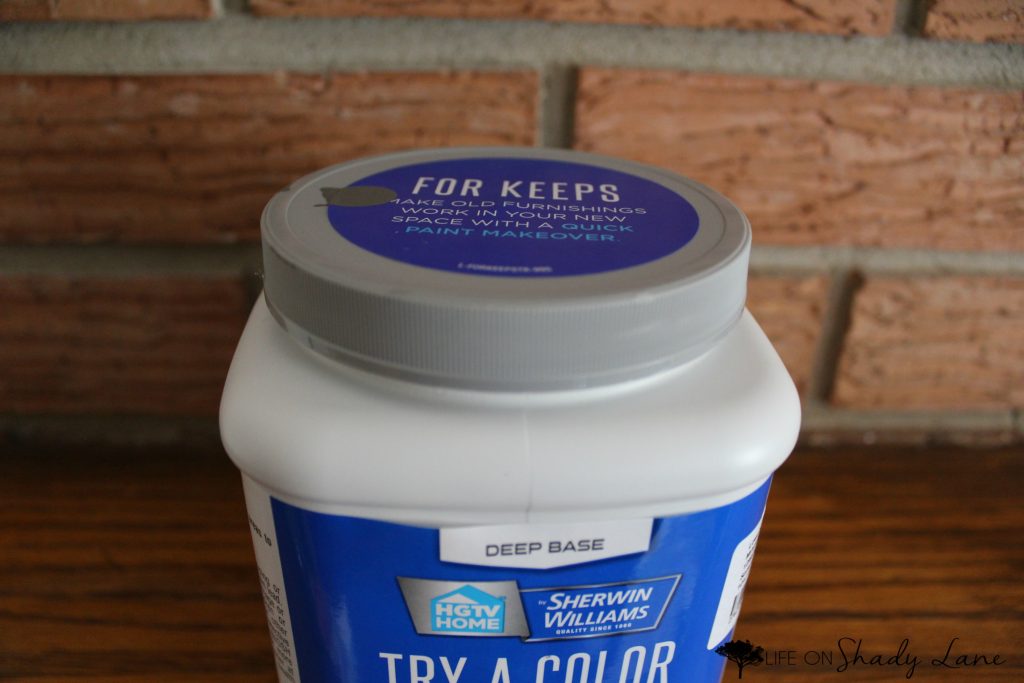
Hardware stores typically sell “sample size” paints – they will tint them whatever color you choose. The idea is that you can try the color before you purchase an entire gallon. BUT…we only needed a tiny bit, so this small amount was perfect…and it was only about $4. #winning
I don’t remember the name of the gray color we chose. I’m not very good at choosing paint colors (I deliberate for far too long), so Brandon picked one out. There are some things in life that you just need to give up control over, amiright?
Step 2: Mix water with your white paint. We did about a 50/50 ratio.
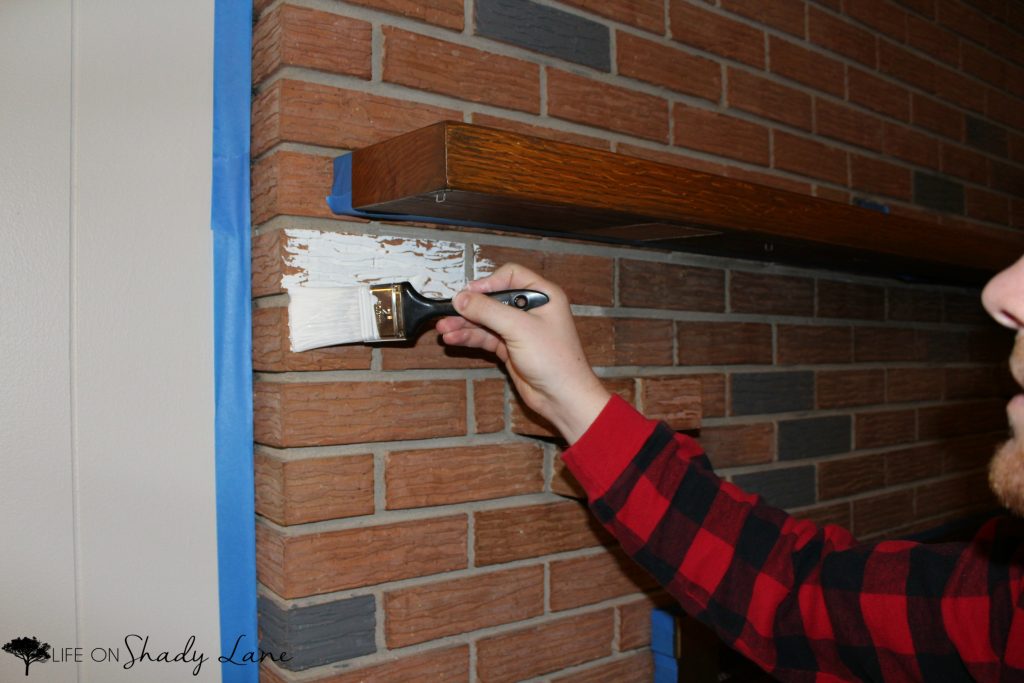
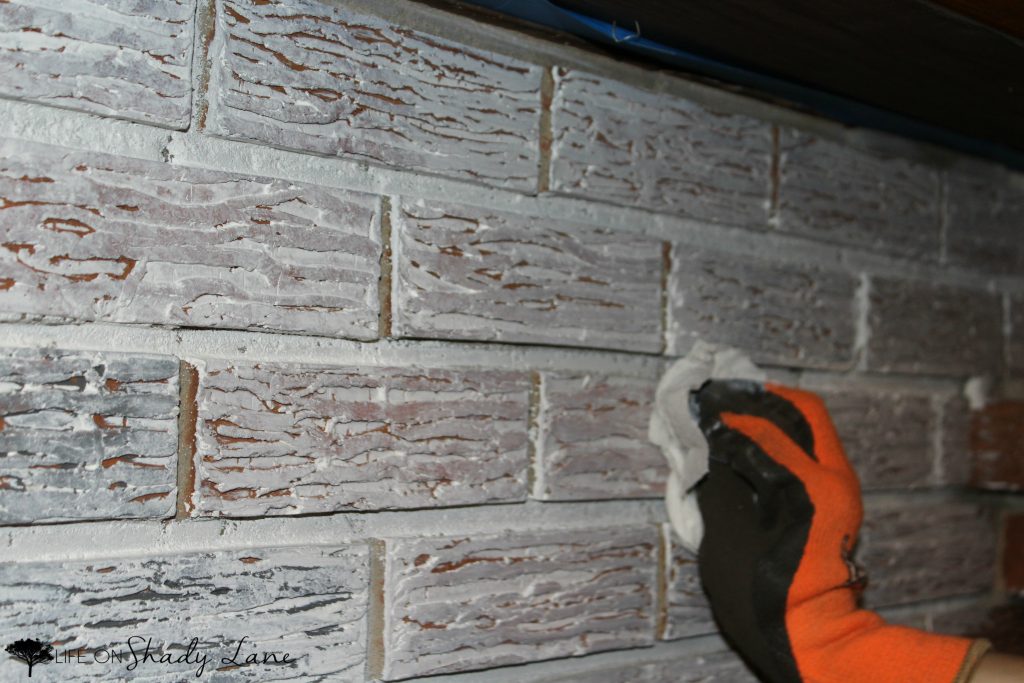
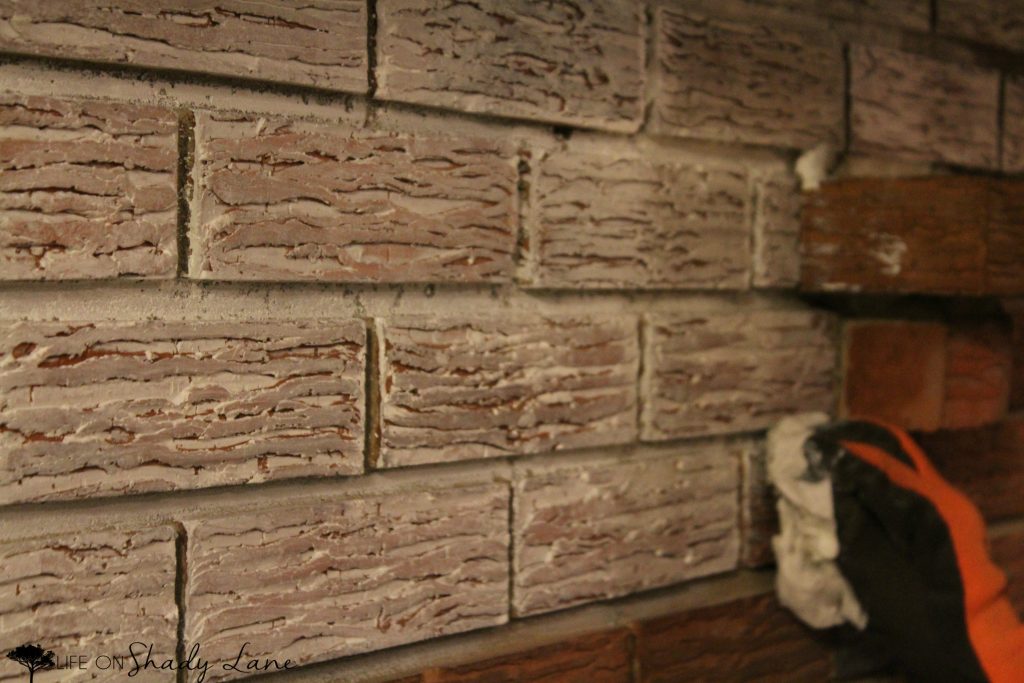
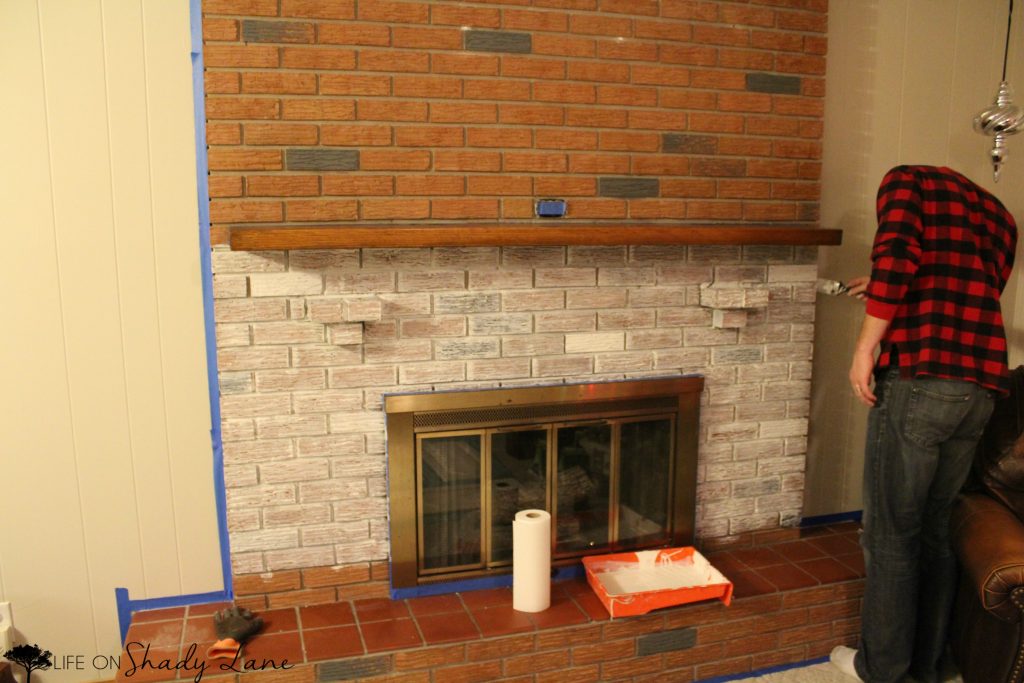
Step 3: Paint over the brick with white paint. We developed a “system”: paint a couple bricks, then dab/wipe with paper towel to remove excess. Use gloves while you’re dabbing to keep your hands paint free! It’s a little messy. You’ll go over the gray bricks too – just do it the exact same way (paint with white paint then dab away the excess). The idea is to have just a little bit of the gray peeking through.
Buy gloves here
Step 4: Paint a few random bricks opaque white.
Step 5: Sand the hearth’s tile with an abrasive sandpaper, and then whitewash it the exact same way you did the brick: Use your 50/50 mixture of white paint and water, paint over the tile, and then dab.
Buy sandpaper here
Step 6: Let it dry!
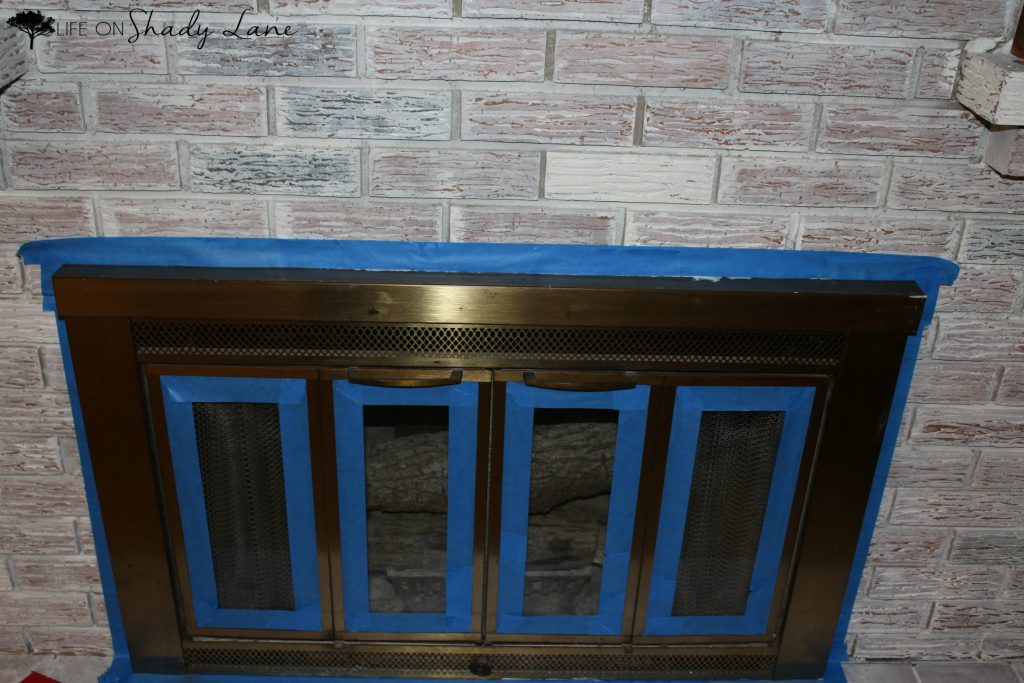
Step 7: Tape and then spray paint the metal part surrounding the opening. If there is a technical term for that part of the fireplace, I don’t know it.
Buy spray paint here
After taping, we held a piece of cardboard up over the glass panes while spraying to avoid overspray.
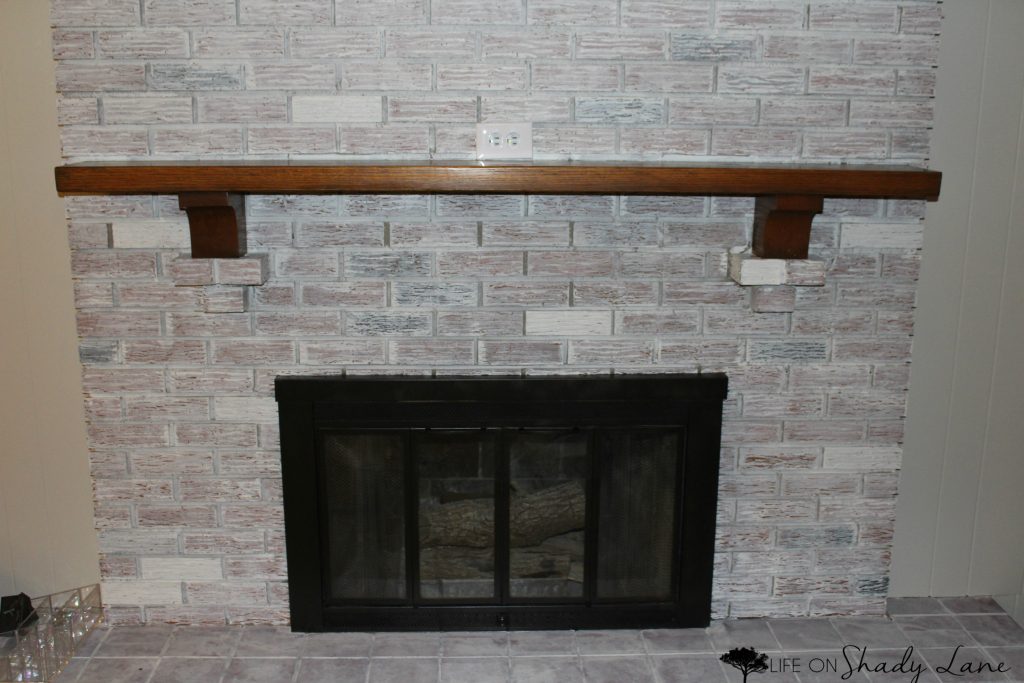
And that’s it!
Like I mentioned, we still haven’t done anything to the mantel because we haven’t decided exactly what we want to do with it. For now, it looks OK…and I’m just happy with how the rest of the fireplace turned out! Easy and inexpensive DIY – you can’t beat that!
If you try this in your home, let me know how it turns out!
To make it easy for you to find this post later, here’s a picture for you to pin to Pinterest…if you’re into that sort of thing! ;)
PIN IT FOR LATER:
Check out more of our home-related projects [here]!
————–
I hope you’ll check out some of my other posts while you’re here, too!
See my DIY projects and inspiration [here]
Check out a home tour [here] *and we’ve moved! see a new home tour [here]
Check out some fashion posts [here]
I hope you enjoyed this How to Whitewash a Brick Fireplace blog post! If you did, please consider leaving a comment! OR feel free to ask any questions – I love to hear from you guys!


I really love your thorough instructions. I have been browsing through Pinterest posts about this for weeks now. I’m still trying to get the nerve to paint my old dark red brick fireplace. I love your idea about painting some of the bricks gray…that’s the look I want. After much looking, I’m thinking of doing this, but not so much white…maybe just lighter than it is now.
Hi Cheryl! YES! Go for it!! Your fireplace will look amazing! Let me know if you have any questions at all. :)
I just have to come back tonight and thank you!!! I could probably write my own blog about this fixer-upper of a house we have! As I posted a couple of days ago (above) I had been thinking for years of painting our massive fireplace. (We moved here 25 years ago!) The fireplace covers almost a whole wall and was just “too much”. It helped a couple of years ago when I found a really pretty piece of furniture that encloses a quartz heater, and that helped put some interest into the space. This year I began to entertain the idea again of painting the fireplace, and I have searched for weeks Pinterest ideas. I gave up a week ago, but picked it up again this week and found your blog. I loved your idea about painting random bricks dark gray, because every brick on my fireplace was…RED. I also totally identified with your idea of using paint you already had. I did not have dark gray but I had dark brown and did just that. It looked really cool. I did not want to use pure white because it felt too stark for me in every Pinterest post I saw, so I bought an off-white from Lowe’s, and then worked for a while adding some brown to it.I had to play with it some to get it just right, but once I got the color right, the technique went really fast. I ended up not having to wipe off paint, but instead just sort of dry-brushed. I’m so happy with it and just wanted to let you know I loved your ideas and it worked beautifully!
Hi Cheryl! Oh my gosh I am SO GLAD your fireplace turned out well!! That’s so exciting – and doesn’t it feel amazing when a DIY project turns out how you imagined!? I’m so happy you found my post helpful. :)
hey Cheryl can you share pics of how yours turned out – I’m interested to see the brown.
Hi Cheryl,
I would love to see a picture of how yours turned out! We have a floor to almost 12 feet “used brick” wall with built in shelving on both ends. We also have looked at a lot of photos on Pinterest and also the
HGTV programs. If you have a chance to send a picture, you can send it to mwpittman@aol.com.
Thanks!
And thanks too to Megan! I love the way yours turned out! Very good idea using a darker color under the white! White can often times be too stark!
Wanda
Hi Wanda! Thank you! So glad you liked the project! If you do it in your home, send me a picture!!! :)
Hi thank you for this post! I haven’t whitewashed the brick yet but I have spray painted the brass doors outside and a little on the inside. Do you recall if you had any issues with the smell of the psint burn off when you first used the fireplace? I just used it for the first time and noticed it was pretty smelly but we aslso just moved in so maybe it smelled like that before
Hey Amy! We haven’t had any issues with paint burn off – it has been perfectly fine!
Hello! Do you recall the type of paint you used? What was the finish for both the white and gray? This looks beautiful!
Hey Sapna! I believe it was just a semi gloss finish!
One thing, you will want to make sure u use a high temp spray paint if the fireplace is functional.
Good tip, Kristyn! We used regular old spray paint and it has held up so far, but high temp spray is a great idea! Thank you. :)
Great tutorial, nice Job! Was wondering, the paint you used for the surround on the fireplace wasn’t intended for hight heat. Do you use the fireplace, and did you have any problems with the paint peeling or bubbling?
Hey Julie! Thanks so much. We do use the fireplace, and it has done just fine with the paint we used!
The spray paint you used on the fireplace enclosure, I use it almost for everything! Love the color, but it’s not for heat, has it changed since you have had a fire in the fireplace? Was going to look for heat resistant paint, should I or not?
Hi Diane,
It still looks the exact same as when we did it – so far (3+ years in, it’s holding up great!)
I have that EXACT red tile and have been wondering what to do with it. I just helped a friend whitewash her fireplace and it looked awesome. Now I have the bug to try it myself, including the tile. How has the paint on the tile held up after sanding and whitewashing? Has it chipped off at all? Mine is actually tiled onto the floor, not raised like yours.
Hi Claire, we lived in the house for almost four years and it held up great that whole time!
Just tried your technique. My fireplace looks great and it was so easy. Wish I could post pics. Your instructions were clear and simple. Inspired me to try it and I’m so pleased with the results. Thanks!
Oh I love to hear that, Diane! I’m so happy it worked out for you! I’d love to see a photo if you’re able to share one over on Facebook (just search shadylaneblog ) !
Was the white paint that you used flat or semi gloss?
Hi Bobbie! I believe it was a semigloss but either one would look great!
What color did you end up doing your mantel? Could you post a picture. Just finished white washing mine and our mantel is the same as yours…really the fireplace looks identical. We don’t thing a stain will hold up cuz of the polish finish of our mantel. We were thinking of painting it dark…
Hi Anna! We actually ended up leaving the mantel the same color!
I absolutely love how your brick turned out !
We’ve bought our home almost a year ago and at first I loved the colourful stone on our fireplace but I’ve recently discovered that I’m so over it ! LOL
It brings back flashes of the 70’s in all its rust/orange/red/grey tones ?
So I’m wondering if you have any advice on if your technique would work on our colourful stone ?
Hi Laura – I definitely think it would work on colorful stone! You may just need a little more of an opaque mix of the white paint to cover up all of the colors a little better. :) I’d love to see how it turns out if you do the project! Email me at lifeonshadylane@gmail.com !
Thank you for your wonderful post. The pics and information are fantastic. I have the exact same 70s brass fire guard and was thinking I would have to replace it just to update my fireplace after white washing the brick. I’m so glad to know that simple spray painting is an option.
It completely changes the look of your fireplace, it’s amazing!